When you want to browse your files and work with them in Windows, most people fire up File Explorer (in Windows 10 and Windows 8) or Windows Explorer (in Windows 7). While these apps are good-enough file managers, for most people, they can be improved and tweaked to work even better. To improve your user experience, we have compiled a list of fifteen tips that you can apply, so that File Explorer or Windows Explorer work the way you want to:
NOTE: This guide covers Windows 10, Windows 7, and Windows 8.1. Some methods work in all three versions of Windows, others just in one or two. For each method, we mention the Windows version in which it works. If you do not know the version of Windows that you have, read this tutorial: What version of Windows do I have installed?
First, open Folder Options in File Explorer or Windows Explorer
Before making improvements to how File Explorer works in Windows 10 or Windows 8.1, and how Windows Explorer works in Windows 7, you need to open the Folder Options window. To learn how this is done, follow the instructions from this tutorial: 8 ways to open the Folder Options window, in Windows (all versions).
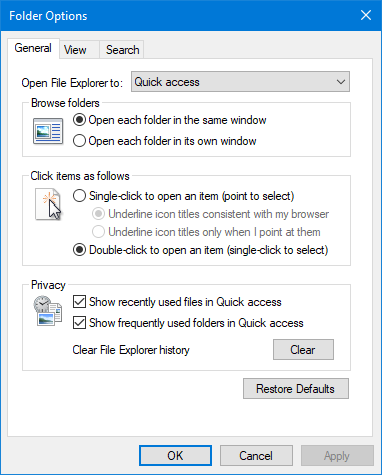
A few interesting configuration options are found in the General tab of the Folder Options window, but many are hidden in the View tab.
Continue reading this guide, as we take each tab one by one, and share the most interesting aspects that can be improved about File Explorer and Windows Explorer.
1. Change the folder opened by File Explorer when you start it (Windows 10 only)
When you open File Explorer, it starts in the Quick Access view that lists the most recently used files, as well as your more frequently used folders. If you do not consider this view useful, you can set File Explorer to open the This PC view that lists all your partitions, libraries and user folders. We consider it more useful. To make this change, in the Folder Options window, see the "Open File Explorer" drop-down list in the General tab. Click on it, and choose This PC.

If you want File Explorer to start using a different folder from your computer than the two options given to you, read this guide: How to make Windows 10's File Explorer start in any folder you want. If you use Windows 7, read this guide instead: Set Windows Explorer to open OneDrive or Dropbox (or any other folder) when starting.
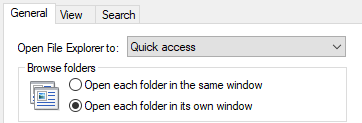
2. Open each folder in a separate window (all Windows versions)
In the Folder Options window, in the General tab, look for the Browser Folders section on the top. There, you can enable a setting that says: "Open each folder in its own window."
This setting does what its name says and, if you open three folders on your Windows computer, you get three different File Explorer windows, one for each folder.
3. Open files and folders with a single click instead of a double-click (all Windows versions)
To open files and folders in Windows, you have to double-click on them. If you prefer a single click, in the General tab of the Folder Options window, choose "Single-click to open an item (point to select)."
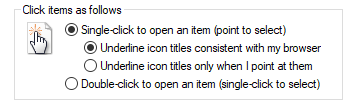
Beneath this setting, you also choose how Windows underlines icon titles: consistent with your web browser or only when you point at them. To give you a perspective on how this change looks, see the screenshot below.
All the files and folders are underlined and open with a single click.
4. Stop File Explorer from showing recently used files, and frequently used folders (Windows 10 and Windows 8.1)
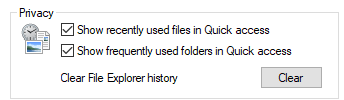
You may share your computer with other people, and you do not want Windows and File Explorer to always show the most recently used files and the frequently used folders. You might want to keep this information private. If that is the case, in the General tab of the Folder Options window, you have settings to stop this behavior. You can find more details in this tutorial: How To Stop Windows 10's File Explorer From Showing Recent Files & Folders.
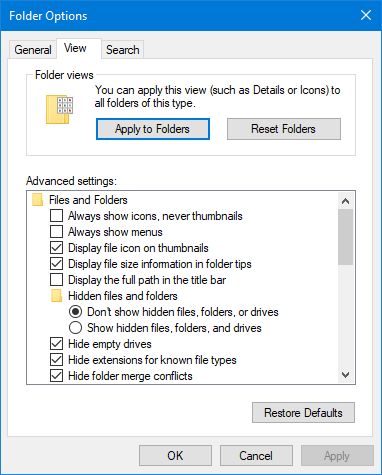
Now it is time to move to the View tab of the Folder Options window.
5. Set File Explorer to always show icons, never thumbnails (all Windows versions)
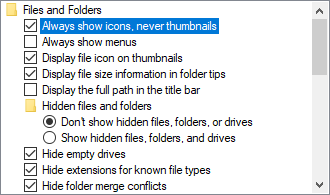
By default, Windows displays the thumbnails of the files that you browse. Most users like this. However, if you are working with a large number of files and folders, Windows becomes slow at loading thumbnails. If that is the case, you can make it faster by setting it to show icons instead of thumbnails. The icons always load faster than thumbnails. In the File Explorer window, go to the View tab. There, in the list of Advanced settings, check the box that says: "Always show icons, never thumbnails."
6. Set File Explorer to always show the full path of folders in the title bar (all Windows versions)
When you use File Explorer, its default behavior is to show the name of the folder that you have opened in the title bar. In the View tab of the Folder Options window, there is a setting that says: "Display the full path in the title bar."
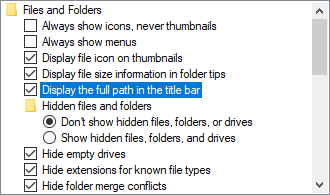
When you enable it, File Explorer always shows the full path to the folder that you are browsing.

You may find this information useful.
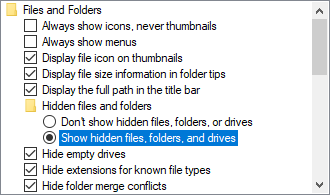
7. See hidden files, folders, and drives, in Windows (all Windows versions)
By default, File Explorer does not display the files, folders, and drives set as hidden. To change this, in the View tab of the Folder Options window, check the box that says: "Show hidden files, folders, and drives."
8. Show empty drives like USB memory sticks or external hard disks (all Windows versions)
One annoying feature of File Explorer is that it does not show empty removable drives that you plug into your Windows computer, in the This PC list from the left side of the window. They must have some data on them to become visible. You can disable this behavior in the View tab of the Folder Options window. Find a setting that says "Hide empty drives" and uncheck it.
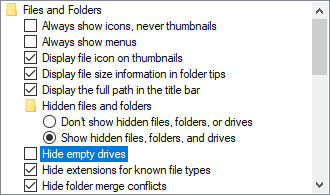
In Windows 7, this setting is named "Hide empty drives in the Computer folder."
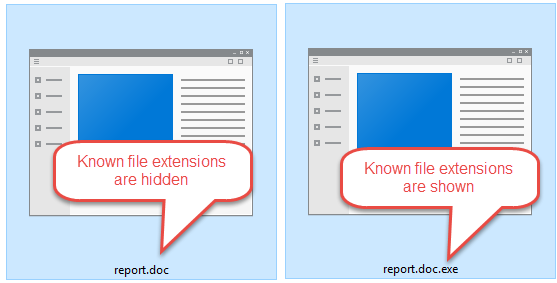
9. Set Windows to show extensions for known file types (all Windows versions)
By default, Windows does not show the extensions of files that have "known" file types like .png, .jpeg, .avi, .exe, and so on. This is a problem because some malware can use this "feature" to trick you into opening an "image" with kittens in its name that is actually an executable that infects your computer with nasty ransomware. You should always uncheck the setting that says "Hide extensions for known file types" in the View tab of the Folder Options window.
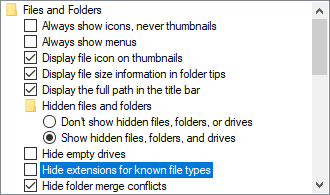
When you disable this "feature," and someone sends you malware named something like report.doc.exe, you see the real file extension, and you realize that something is not right. If this "feature" is enabled, you only see report.doc, and you might open the file and get infected.
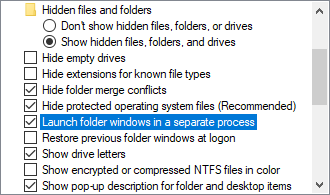
10. Set Windows to launch folder windows in a separate process (all Windows versions)
When you use File Explorer to navigate multiple folders, in multiple windows, Windows uses the same explorer.exe process for all windows. Therefore, if one File Explorer window crashes, you have to force close all of them, to be able to restart File Explorer, and use it again. If you enable the "Launch folder windows in a separate process" setting, each File Explorer window gets a separate explorer.exe process. Therefore, if a File Explorer window crashes, it does not negatively affect the others, and you can keep using them.
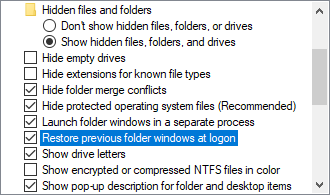
11. Set Windows to reopen the previous folder when you log in (all Windows versions)
You can set Windows so that, when you log on, it automatically opens in File Explorer the last folder that you have opened, before restarting your PC, or signing out of your account. In the View tab of the Folder Options window, enable the setting that says: "Restore previous folder windows at logon."
12. Use check boxes to select items in File Explorer (all Windows versions)
By default, to select items like a file or folder in File Explorer without opening them, you need to press and hold the CTRL key on your keyboard and click on those items. If you prefer to see a checkbox and use that instead, in the View tab of the Folder Options window, check "Use check boxes to select items."
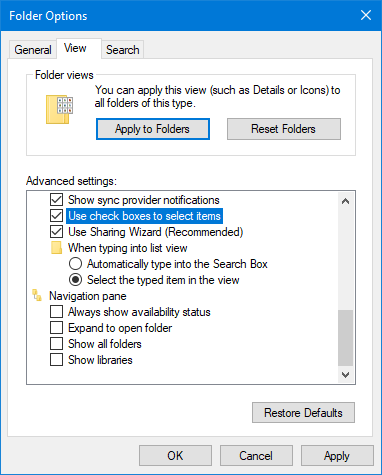
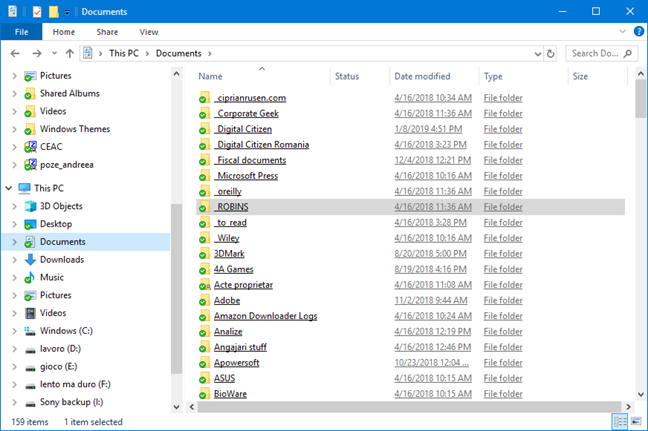
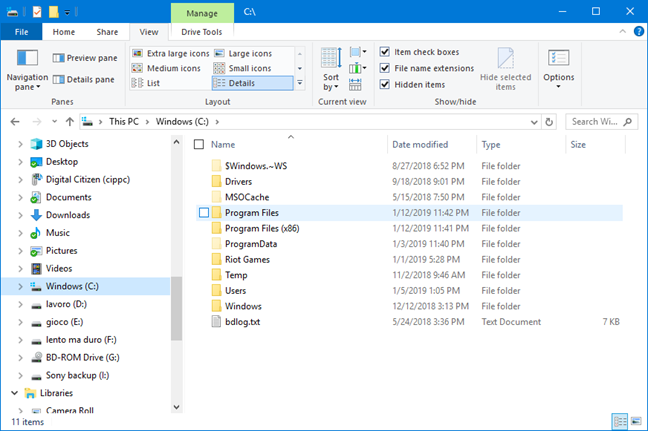
After you enable this setting, you see a checkbox near the name of each file or folder, when you hover your mouse over it. You can see it in the screenshot below.
13. Bring back the Libraries in File Explorer (Windows 10 and Windows 8.1)
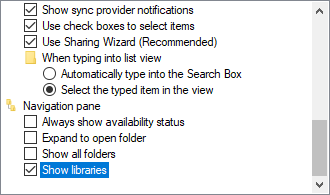
The Libraries section is no longer shown by default in File Explorer. If you like this feature of Windows, and you want to use it, check the setting that says "Show libraries."
Learn more about bringing back the Libraries section, in this guide: How to enable the Libraries in Windows 10 and Windows 8.1.
14. Show more folders and drives on the left side of File Explorer/Windows Explorer (all Windows versions)
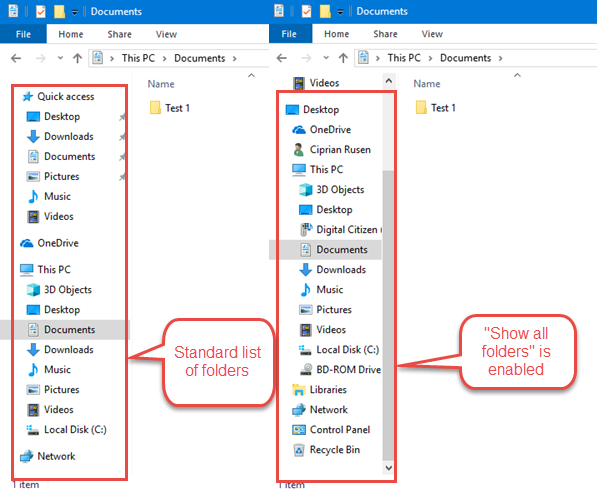
On the left side of the File Explorer window, you see a standard list of folders that includes things like Quick Access, OneDrive, This PC, and Network. If you enable a setting named "Show all folders," you get to see more folders on the left side.
See below a comparison. When you set Windows to show all folders, you see more folders like your user folder, the partitions on your computer, a link to the Control Panel, the Recycle Bin, and more.
In Windows 10, this setting is found in the View tab of the Folder Options window, and it is named "Show all folders."
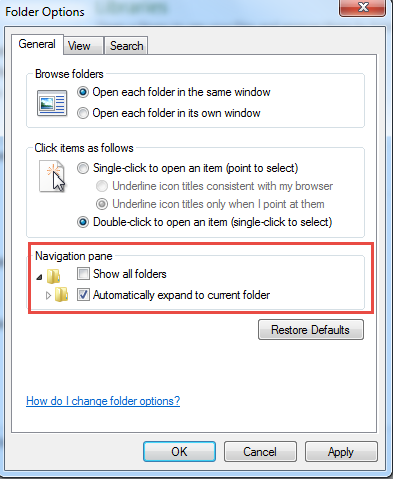
In Windows 7 and Windows 8, the same setting is found in the General tab of the Folder Options window.

15. Set File Explorer to expand the folder that you have opened (all Windows versions)
By default, when you open folders in File Explorer, nothing changes in the panel on the left side of the window. You see just the standard folders, at all times. However, you can set it to expand to the current folder that you are browsing, like in the screenshot below.
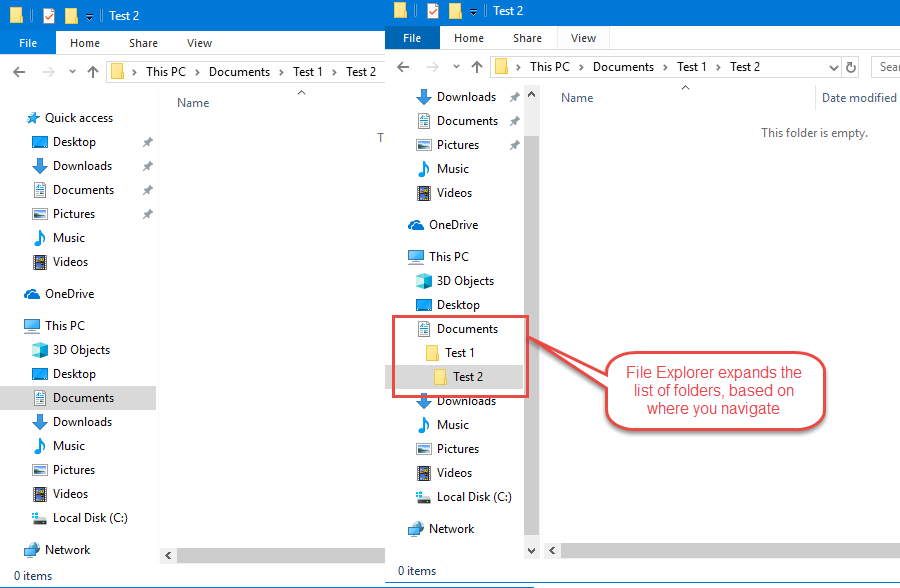
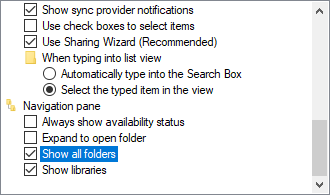
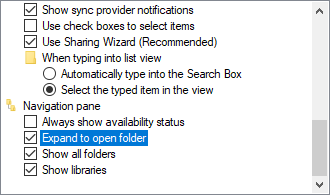
To enable this behavior, check the "Expand to open folder" setting. In Windows 10, it is found in the View tab of the Folder Options window.
In Windows 7 and Windows 8, the setting is found in the General tab of the Folder Options window, and it is named "Automatically expand to current folder."
Do not forget to press OK or Apply to save your changes
When you are done making all the changes you want to File Explorer or Windows Explorer, do not forget to click OK or Apply in the Folder Options window. Otherwise, your changes are not applied. Also, before closing this tutorial, share with us the changes you made. What features did you enable or disable for File Explorer? Comment below and let's discuss.