
Do you need to create a VPN connection on your Windows 7 laptop or desktop computer? Do you need to know how to connect to VPN servers and disconnect from them when you no longer need to use them? Then you're in luck as this guide will offer the answers you seek. Let's get started:
NOTE: If you don't know what VPN services are, read this article before moving forward: What is VPN? What does it do?.
How to create a new VPN connection in Windows 7
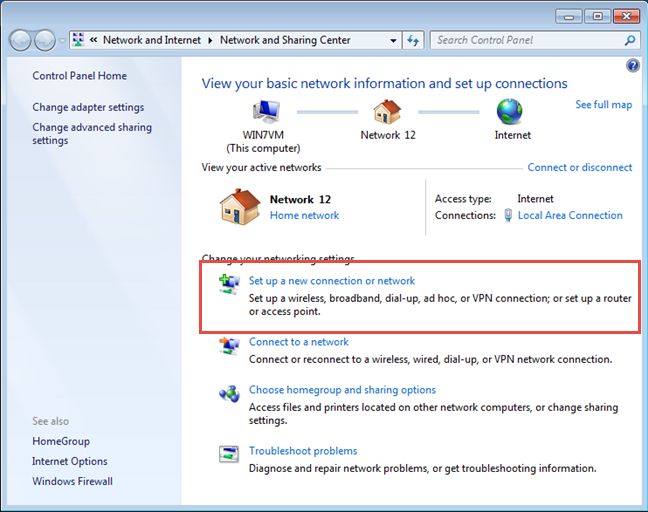
Before connecting to a VPN server, you first need to create a connection to it. Before you do that, make sure that you have an internet connection available and that you know the address of the VPN server (it is either an URL or an IP address), as well as the username and password that you need to use in order to log into it. Once you have these details available, open the Control Panel and click "Network and Internet" followed by "Network and Sharing Center". If you want to learn more about the Network and Sharing Center and other ways of opening it, read this guide: What is the Network and Sharing Center in Windows?.
Once you are inside the Network and Sharing Center , click the link that says: "Set up a new connection or network".
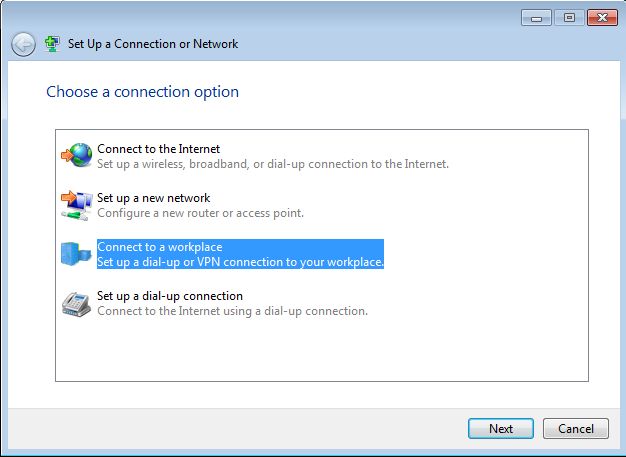
The " Set Up a Connection or Network" wizard opens. Click "Connect to a workplace" and then Next.
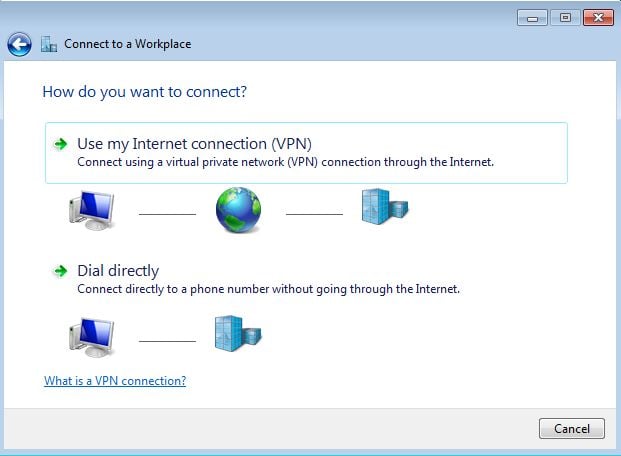
You are asked how you want to connect. Click "Use my Internet connection (VPN)".
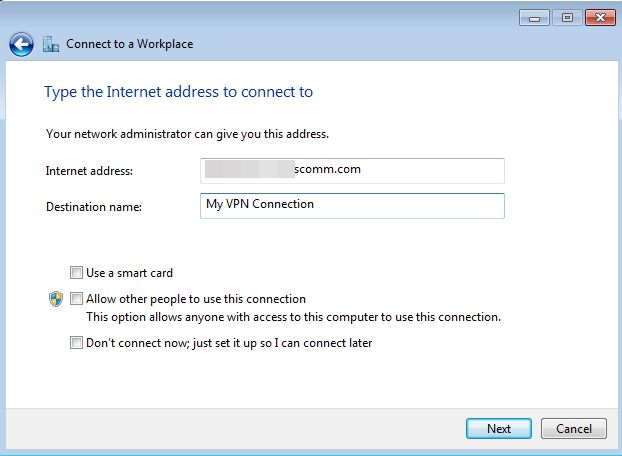
First, enter the address of the VPN server that you want to connect to, in the Internet address field. This address can be a either a URL like vpn.digitalcitizen.life or an IP address like 104.40.211.35. Then, type a descrip tive name for your VPN connection in the Destination name field. You can also set whether you want to allow other people to use this VPN connection or whether you want to connect now. Then, click Next.
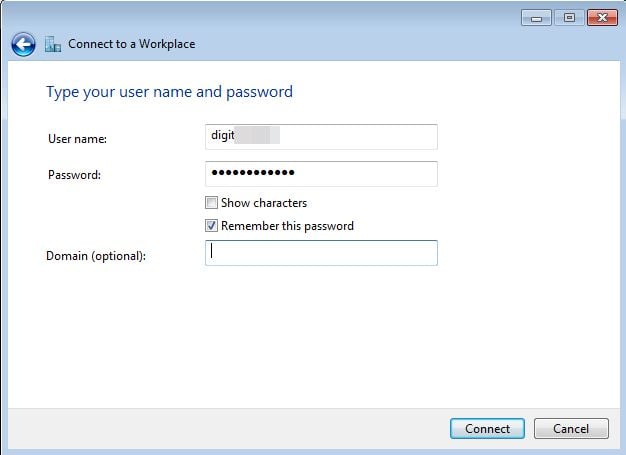
You are now asked to enter the username and password for connecting to the VPN server. Type them in the appropriate fields and check whether you want Windows 7 to show the characters you typed in the password, so that you can verify yourself and whether you want it to remember the password you just typed. Some VPN servers may require you to enter a domain name. Type it in the appropriate field, if necessary. This option may be required for corporate VPN connections. When you are done entering the necessary connection details, click Connect.
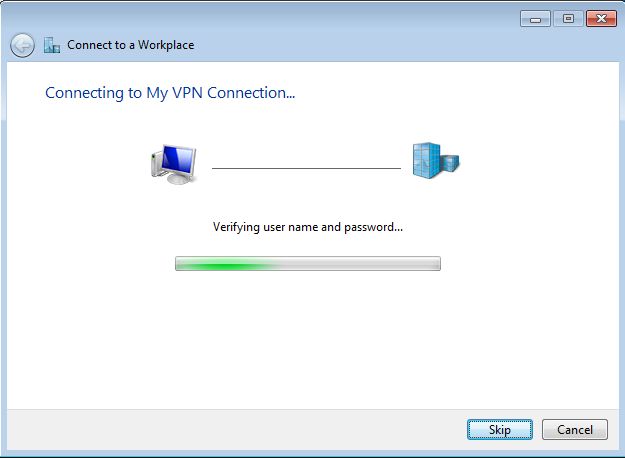
If you did not mention that you don't want to connect now, Windows 7 automatically establishes a connection to the VPN server you entered and verifies your username and password. The process takes a couple of seconds.
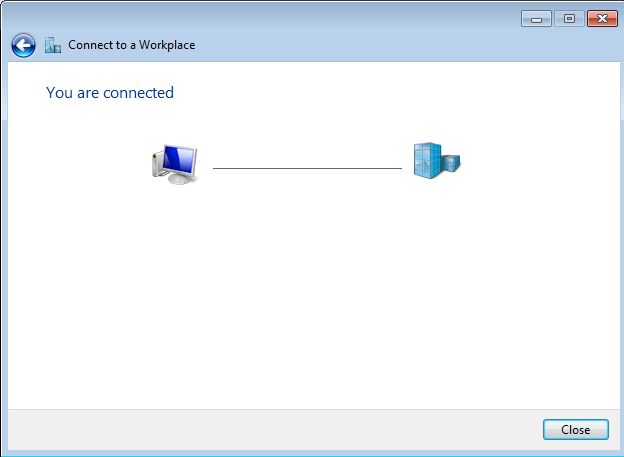
If all went well and you entered the necessary connection details correctly, y ou are inf ormed that you are connected to the VPN server. Click Close and you are done creating the VPN connection.
How to connect to your VPN server in Windows 7
Now that you have created the VPN connection, you will want to know how to use it and connect to the VPN server every time you need that. Connecting to VPN services first requires you to be connected to the internet.
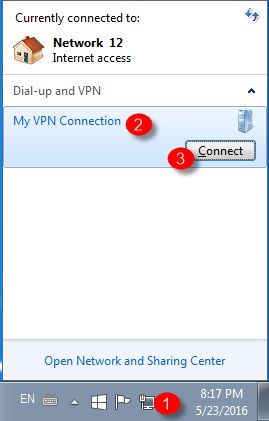
Once you have internet access, on the Windows 7 Desktop, click the network icon in the bottom right corner. This icon will be a WiFi icon if you are on a wireless connection or a cable icon if you are on wired connection.
Next, in the list of available networks and connections, click the VPN connection that you want to establish. Then, click the Connect button.
A connection window is shown on the screen. Depending on how you have set the VPN connection during the instructions from the previous section of this guide, you may be required to enter the username and password. If you have set Windows 7 to remember these connection details, all you have to do is click Connect.

The VPN connection is established in a couple of seconds.
How to disconnect from your VPN server in Windows 7
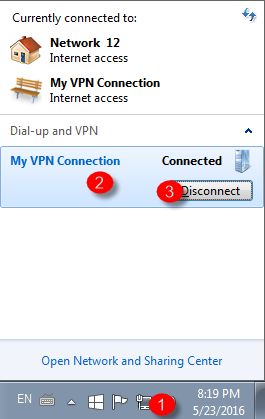
When you are done using your VPN connection, you can disconnect from it with ease. Click the network icon in the notification area of your Desktop. It is found in the bottom-right corner of the screen. Then, click the VPN connection and then Disconnect.
The VPN connection is no longer used. You can connect it to again, anytime you wish.
Conclusion
As you can see in this guide, creating VPN connections in Windows 7 is easy. First you have to create the VPN connection and then you can establish the connection anytime you want to. If you have any questions on this subject or you need our help, don't hesitate to ask using the comments form below.