


Microsoft Word is one of the most powerful text processors of all time, allowing you to create various types of documents. However, creating documents is not just about entering text and stuffing information in them. It’s also about making everything look the way you want it. And, if you want to have a neatly looking document, you will want to set up its layout accordingly. It’s also important to have the correct settings when you print the document to ensure that it will look just as great on paper. In this tutorial, I’ll show you how to change the layout of a document in Microsoft Word, including the margins, page orientation, and paragraph spacing. Without further ado, let’s start:
How to change the margins of a document in Word
Margins are the blank spaces around the edges of your document. They can affect how much text you can fit on a page, as well as the overall appearance of your document.
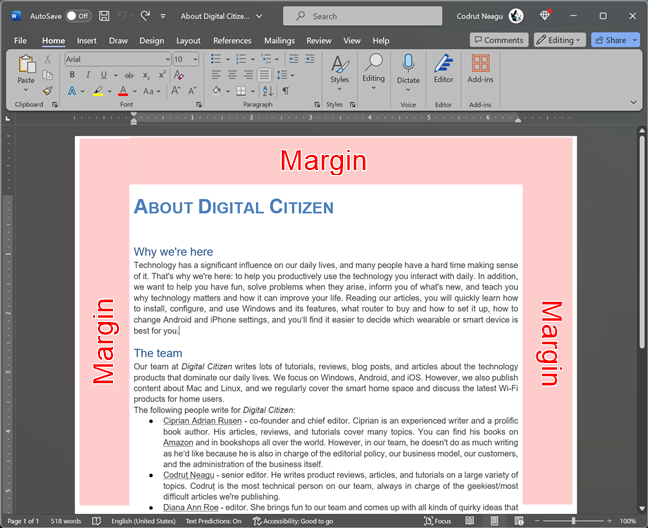
Margins in a Word document
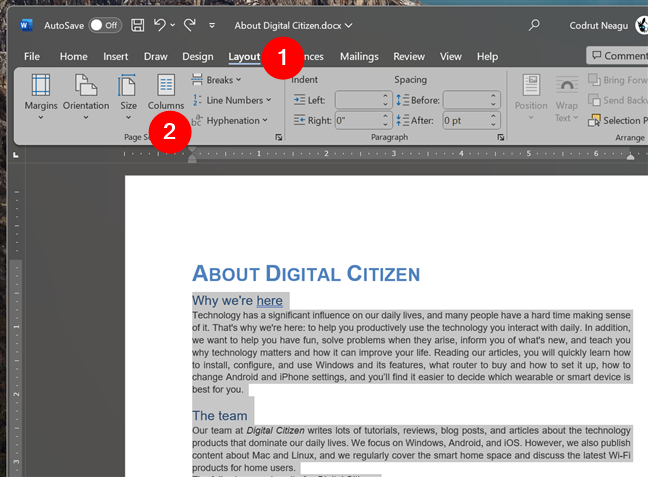
To change the margins in Word, first, select the Layout tab in the ribbon interface at the top of the window.
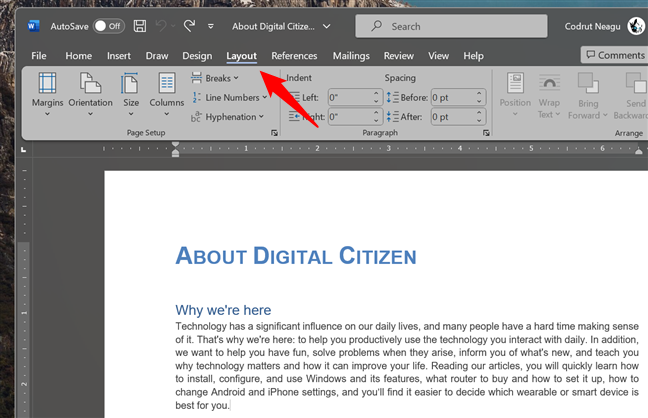
Click/tap Layout in the ribbon interface
Next, click the Margins button in the Page Setup group on the left.
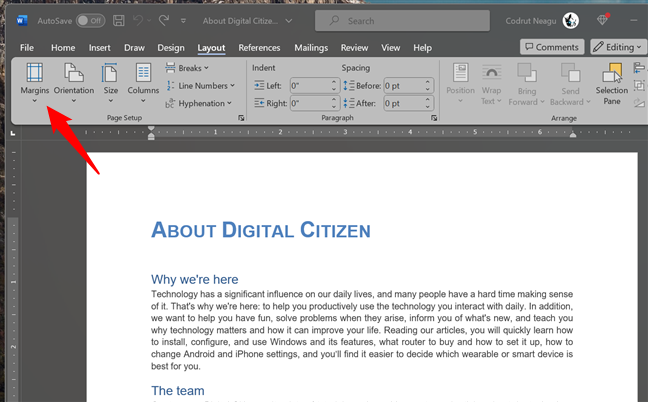
Click or tap Margins
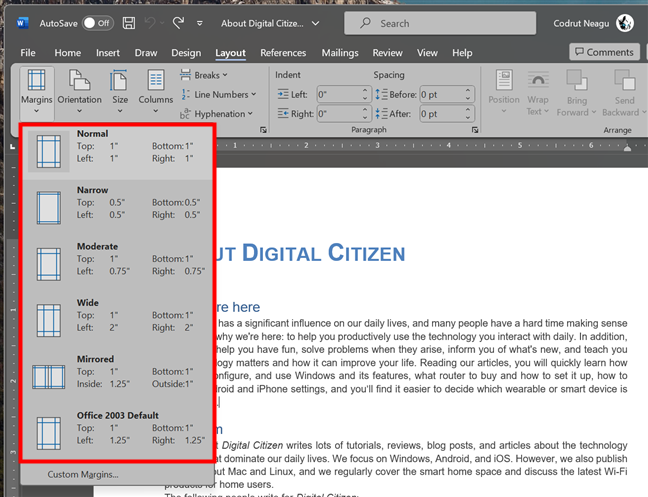
Select one of the standard margin options, such as Normal, Narrow, Moderate, or Wide.
How to add or remove margins in Word
You can also click or tap on Custom Margins if you want to define your own margin sizes.
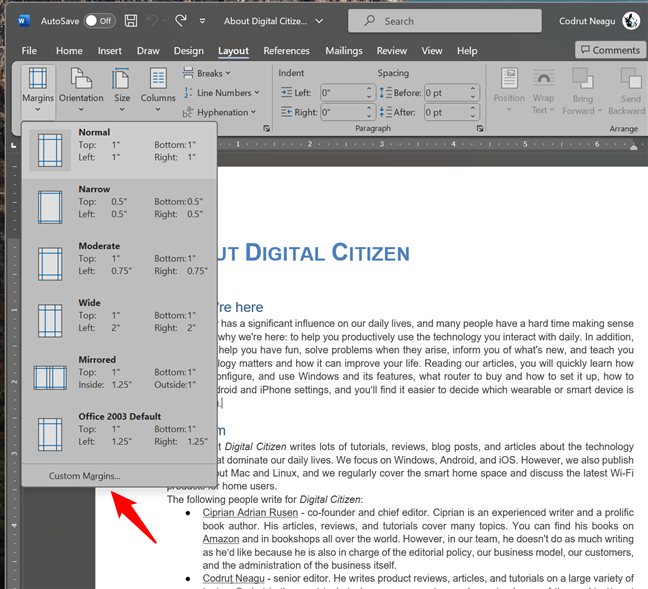
How to set Custom Margins in Word
This will open the Page Setup window, where you can specify the exact sizes for the paper margins in your Word document. As you can see in the next screenshot, each margin has its own setting (Top, Left, Bottom, and Right margins are 1 inch each), and you can also add different values for the Gutter and Gutter position (the additional space on the page margin that’s required when you print on two sides or you intend to bind multiple sheets of paper).
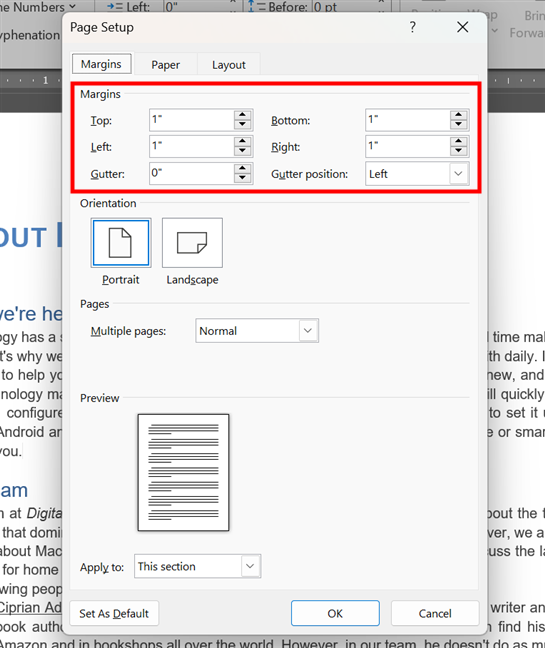
Manually specified margins for a document
After making all the changes you want, you need to decide how to apply the margin settings. If you want them applied to your entire document, at the bottom of the Page Setup window, make sure you select Whole Document in the drop-down menu next to Apply to. If you only want to apply them only for the current section or just from your current position, choose This section or This point forward.
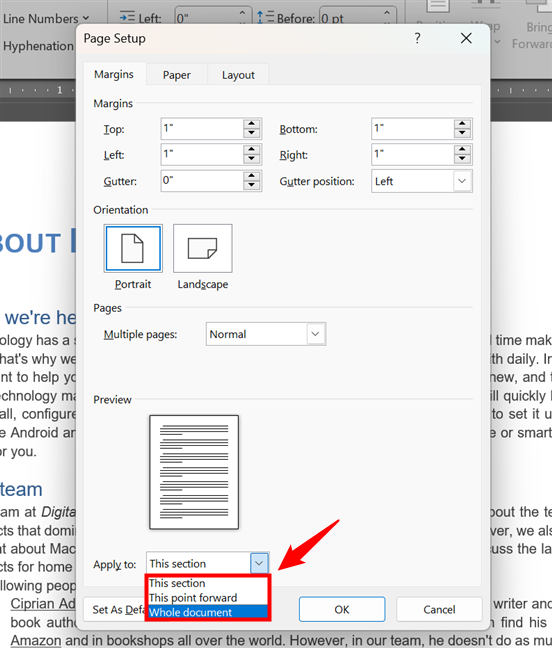
How to apply the margins settings
When you’re done, click or tap the OK button to save the changes you’ve made.
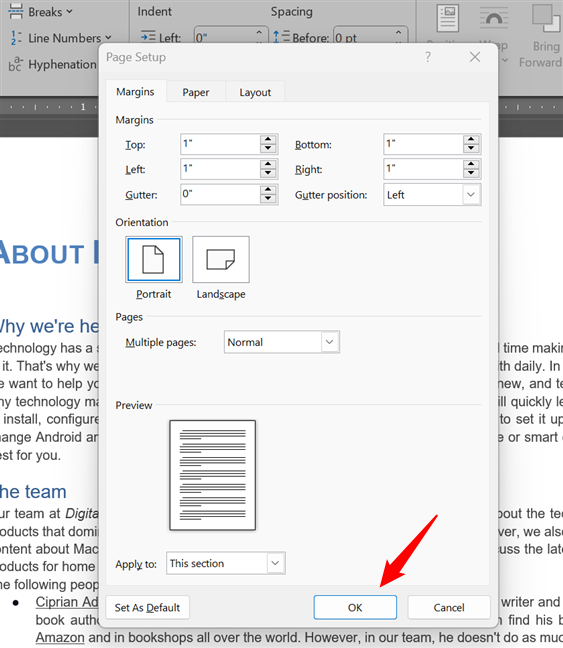
Press OK to save the new margins settings
TIP: Do you also need to change the look of the text in your document? Here are four ways to align text in Microsoft Word.
How to change the page orientation in Word
Page orientation refers to whether your document is displayed in portrait mode (vertical) or landscape mode (horizontal). This can affect how much content you can fit on a page, as well as how your document looks when printed. Here’s what to expect from a document in portrait view versus landscape mode:
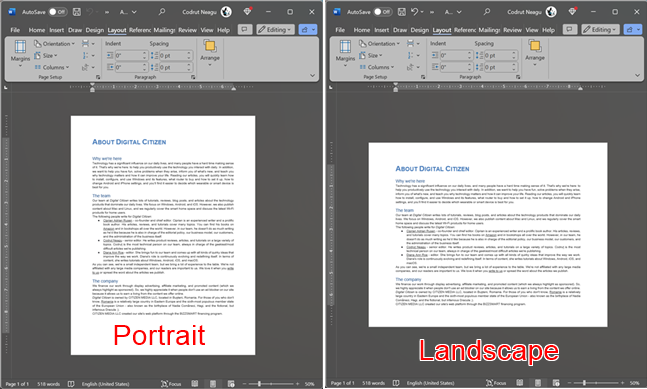
How a document looks in portrait vs. landscape mode
To change the page orientation in Word, select the Layout tab on the ribbon interface, and click or tap the Orientation button in the Page Setup group.
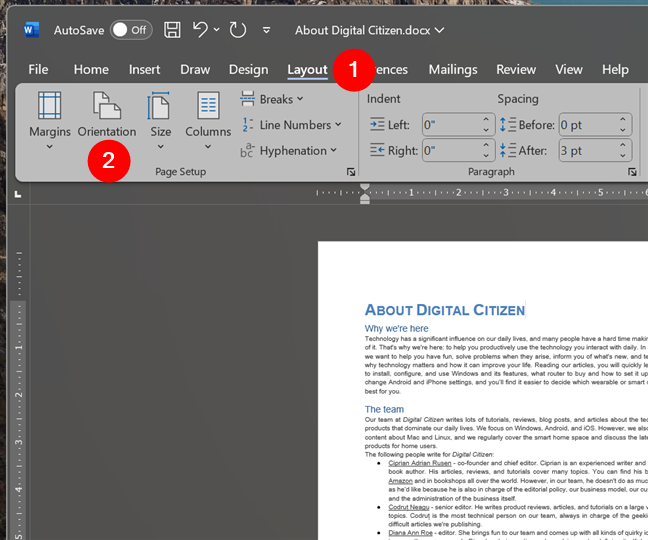
Go to Layout and click Orientation
Then, choose Portrait or Landscape, depending on what you prefer.
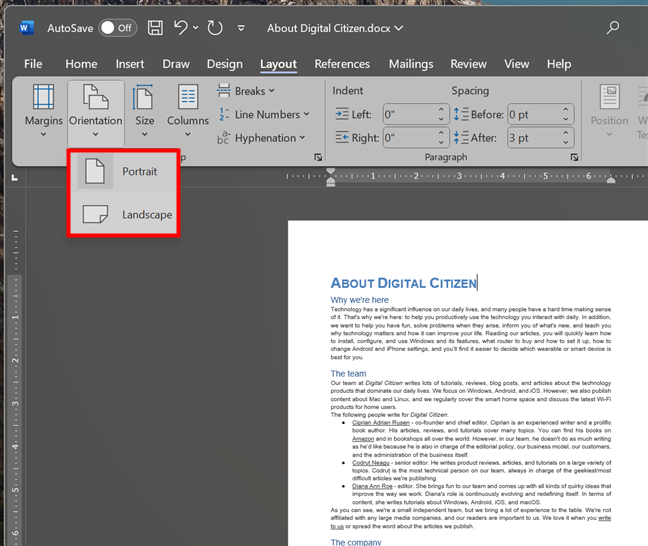
Choose Portrait or Landscape for the document
The previous action will change the orientation for the selected sections in your Word document. However, if that doesn’t suit you, note that you can also tweak the orientation settings for a single page, for all of them, or only for some. For guidance on how to do all that, check out these tutorials:
- How to change the orientation of one page (or more) in a Word document
- How to change the orientation of all the pages in a Microsoft Word document
How to change the page size in Word
Setting the correct page size for your document is crucial if you want to print it: you should select the size of the paper you will be printing it on, so the document’s content will appear just as it does in Word. To change the paper size for the whole document, go to the Layout tab and click or tap Size.
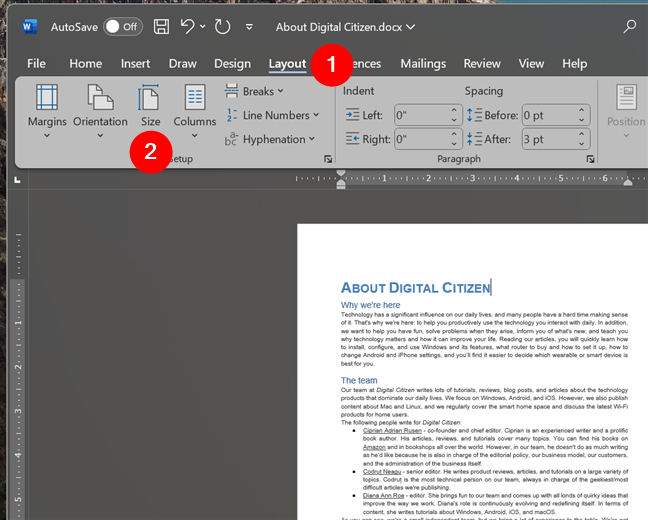
Go to Layout and click on Size
You will then see a list of standard paper sizes, such as Letter, A4, and A5. If the paper you need is there, select it by clicking or tapping it.
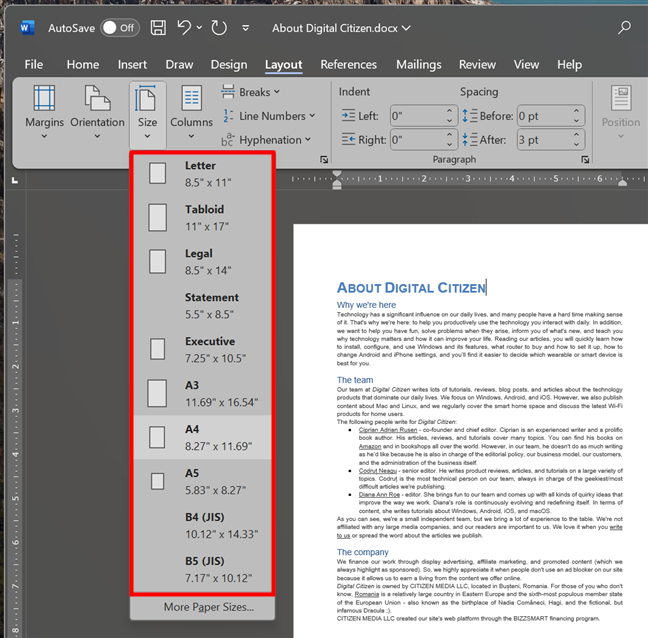
How to change paper size in Word
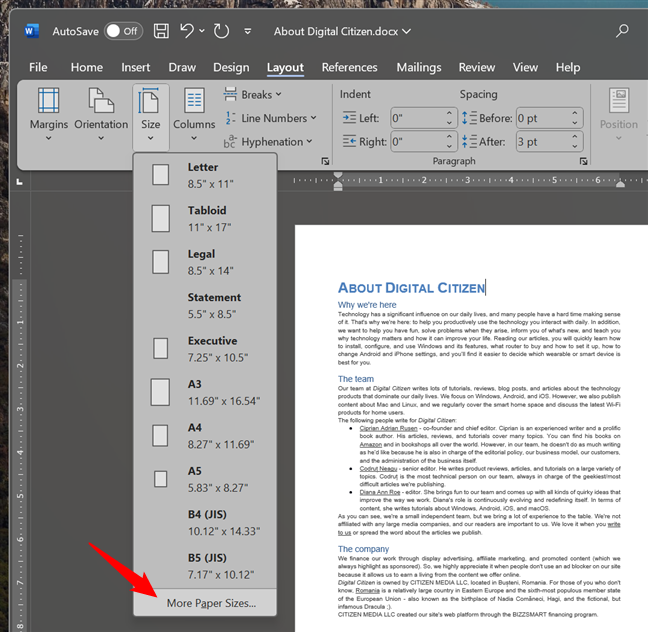
If you can’t find the size you need, click or tap the More Paper Sizes option at the bottom of the list.
More Paper Sizes
This opens the same Page Setup window you’ve seen in the previous section of this guide. In it, make sure that the Paper tab is selected, select the Custom size option under Paper size, and type the Width and Height of the paper you’re going to use.
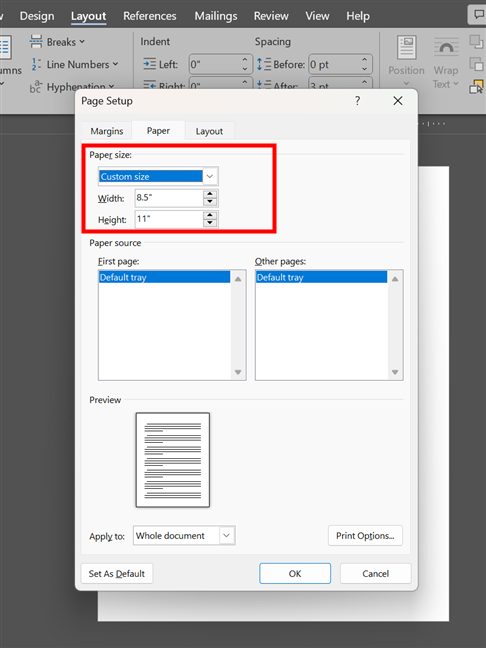
Choose a custom paper size in Word
By default, the paper size is applied to all the pages in your Word document. If you need to use different paper sizes for different pages, adjust the Apply to setting to your specific requirements. For instance, you can choose to change the paper size for just one page or for an entire section of your Word document.
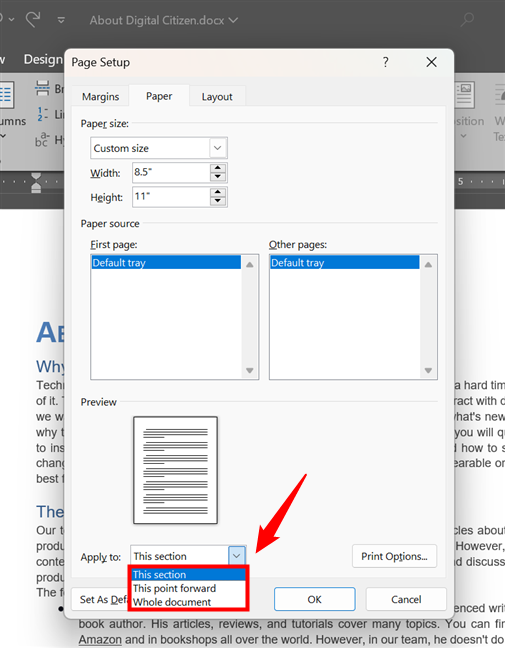
How to apply the size of the paper in Word
When done, don’t forget to click/tap OK to apply the new settings.
How to add columns to a document in Word
Another way to adjust the layout of a Word document is to use columns for the content. To do that, select the text for which you want to use a column format. Then, select the Layout tab in the ribbon interface at the top of the Word window, and click or tap the Columns button.
Go to Layout and click on Columns
TIP: If you want to use columns for the whole document, press Ctrl + A to select all the text and other content.
Then, select the number of columns you’d like to use for the selected text.
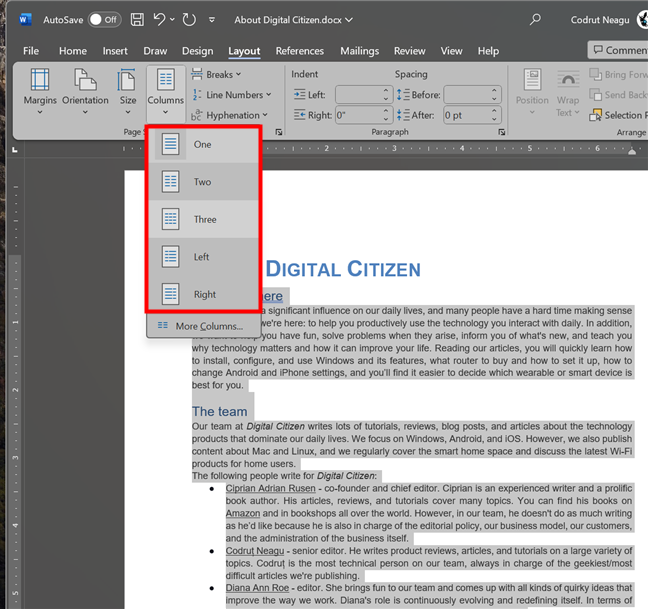
Select the number and format of columns
If you can’t see the number of columns or the column format you need in the list, click or tap on More Columns at the bottom of the drop-down menu. Then, you’ll be able to customize things like the number of columns, their width, or spacing. But there’s more on that in this dedicated tutorial we published some time ago: How do I write in two, three, or more columns in Word documents?.
How to adjust paragraph spacing in a Word document
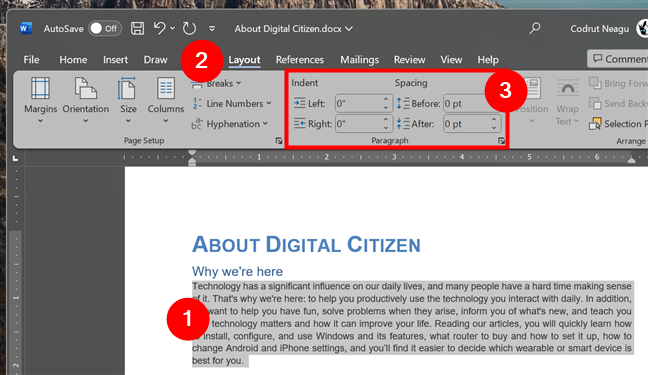
Microsoft Word also allows you to adjust the layout of a document by changing paragraph spacing. This is the amount of space left between paragraphs or lines of text in your document. To change this spacing in Word, select the text to work with, switch to the Layout tab in the ribbon, and enter the Indent and Spacing values you prefer in the Paragraph group of settings.
How to change the paragraph spacing in Word
For example, here’s what adding a Left and Right 0.5 inches Indent plus 12 points Before and After Spacing does to the paragraph I selected:
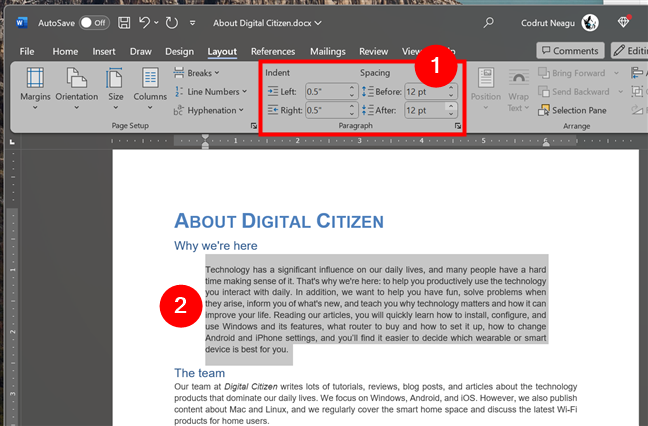
A paragraph with custom indentation and spacing
You can use the line spacing options to make your Word document easier to read, to emphasize important sections, or simply to make it prettier. 🙂
Other layout changes you can make in a Word document
As you’ve probably noticed, the Layout tab in Microsoft Word includes a few other options. Here’s what you can do with them:
Add Line Numbers to your document
Line Numbers are exactly that: numbers that show on the left margin of every line in your document. While this probably isn’t a feature you’ll need often, Line Numbers can be useful from time to time. For instance, when you’re editing or reviewing a document and want to tell a collaborator exactly where to look.
To enable line numbers in Word, select the Layout tab in the ribbon interface and click or tap the Line Numbers button in the Page Setup group.
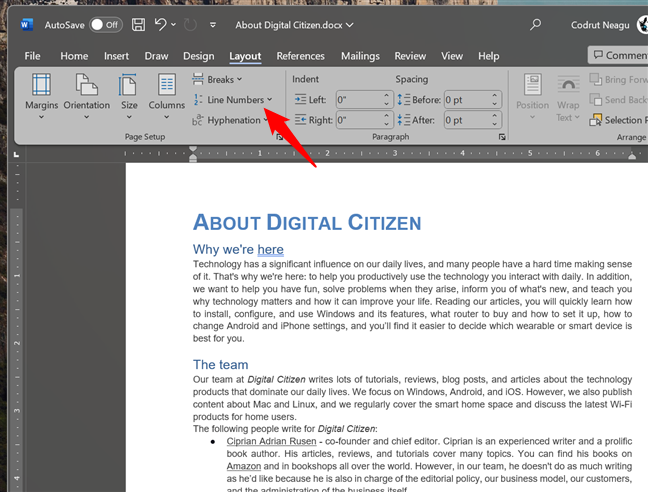
Line Numbers in Microsoft Word
Then, select how you want the Line Numbers to be displayed. You can choose Continuous numbering, make them Restart Each Page or Restart Each Section of your document, etc.
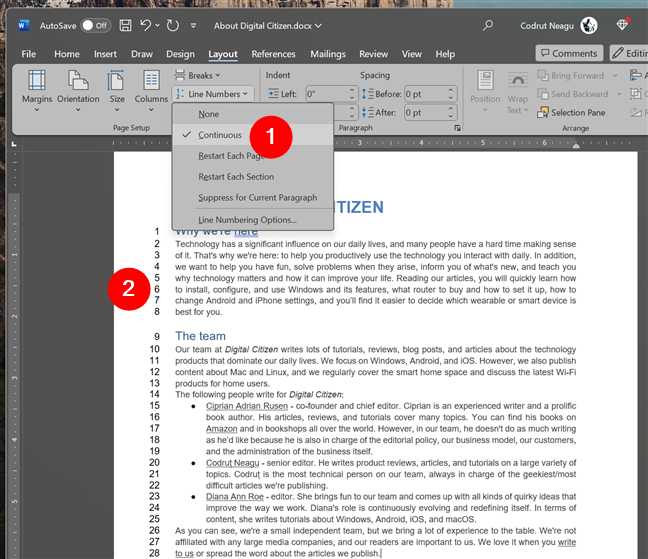
What Line Numbers look like in a Word document
TIP: When you no longer need them, you can turn Line Numbers off by selecting None in the same Line Numbers menu.
Use Hyphenation in your Word document
As you know, hyphenation is the process of breaking a word into syllables and inserting a hyphen (-) between them at the end of a text line.

What hyphenation means
If you want that in your Word document, go to the Layout tab and click or tap the Hyphenation button in the Page Setup group.
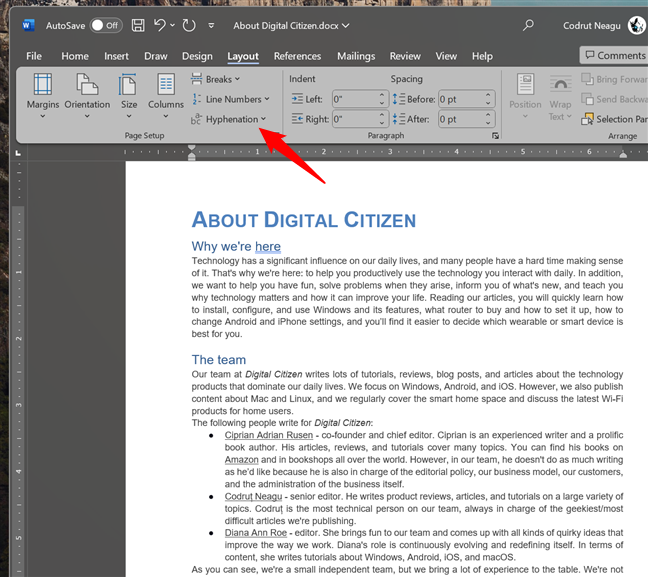
Hyphenation in Microsoft Word
In the drop-down menu, choose whether you’d like Hyphenation to be applied automatically or manually. To get an idea of what to expect, check out the screenshot below: when I enabled Hyphenation in my document, the Amazon word at the end of the line was split as Am-azon.
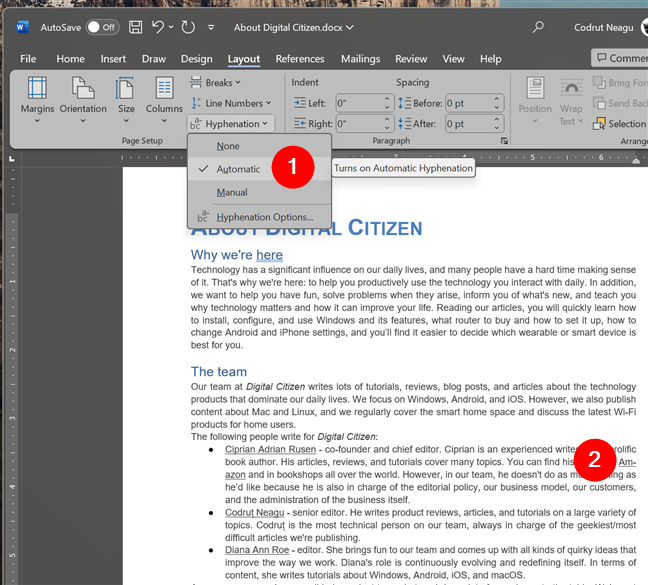
What happens when you enable Hyphenation in Word
TIP: If you need to further tweak this feature, you can click or tap Hyphenation Options at the end of the Hyphenation drop-down menu. Then, you can change a few things like whether to “Hyphenate words in CAPS” or “Limit consecutive hyphens [...]”.
Arrange pictures or other objects in your Word document
Last but not least, you can also use Word’s Layout tab to position and arrange other objects in your document. Like pictures, for example. To do so, select the image you want to arrange and access the Layout tab. Then, depending on what you prefer, you can use the buttons in the Arrange group of settings to Position it, choose different Wrap Text options, Align and Rotate it, and so on.
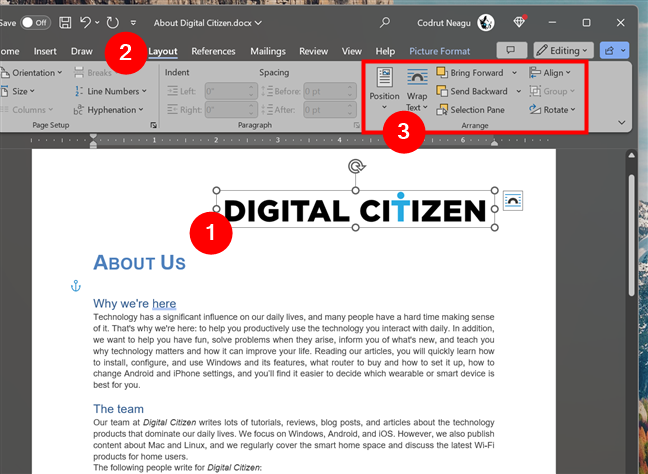
Arrange options available in Microsoft Word
Note that you can hover over most options in the Arrange group of Layout settings to see a preview of how it will affect the selected image or object. I recommend playing with these options as this is mostly a “try and see” process to get exactly what you want. Moreover, if you need detailed instructions on how to arrange objects in Word, read this guide: How to add and edit pictures and shapes in Microsoft Word.
Do you need to know something else about Word Layout options?
As you’ve seen, changing the layout of a document in Microsoft Word is both easy and complex. Easy because anyone can do it, and complex because there are so many options for customizing every little aspect. However, patience and attention to detail are mandatory if you want to create well-formatted documents that look great both on the screen and on paper. Now that you know how to change things like margins, page orientation, or line spacing, is there anything else you’d like to learn about Word document layouts? Let me know in the comments section below.
