While not popular, Hot Corners are, in our opinion, one of the greatest features of macOS. With Hot Corners, you can assign a different action to each of the four corners of your Mac's display screen. You can then move your cursor to these special areas, and your Mac performs the designated action. This tutorial illustrates all you need to know about the Mac Hot Corners and how to use them:
NOTE: This guide covers macOS Catalina or newer. The features shared in our guide may not work on older versions of macOS. To check your version, read What version of macOS do I have?
First thing first: Access Hot Corners on your Mac
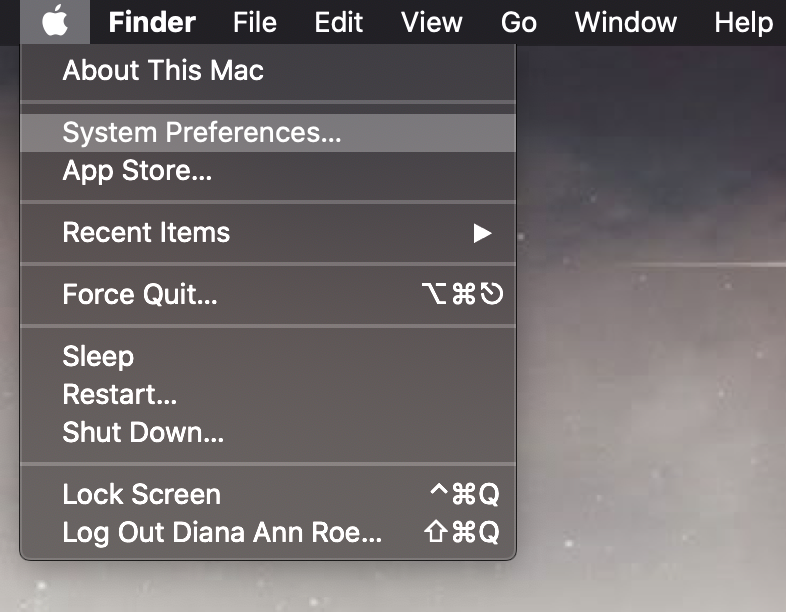
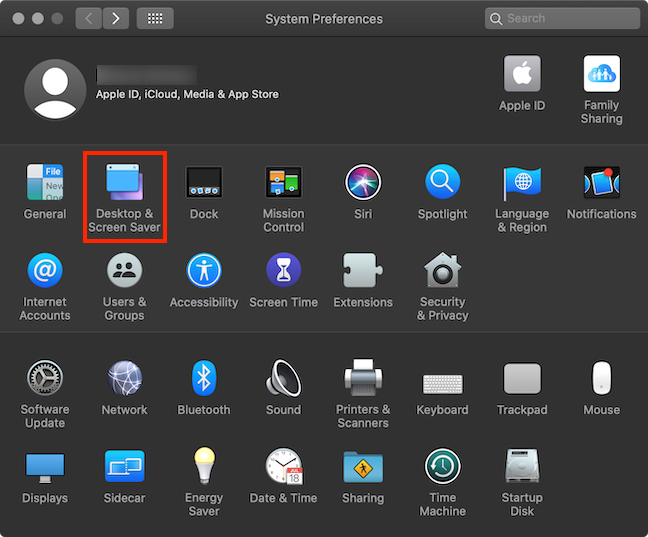
There are two ways to access the Mac Hot Corners setting, but first, you need to open System Preferences. Click the Apple logo in the upper-left corner of your screen to access the Apple menu and press on System Preferences.
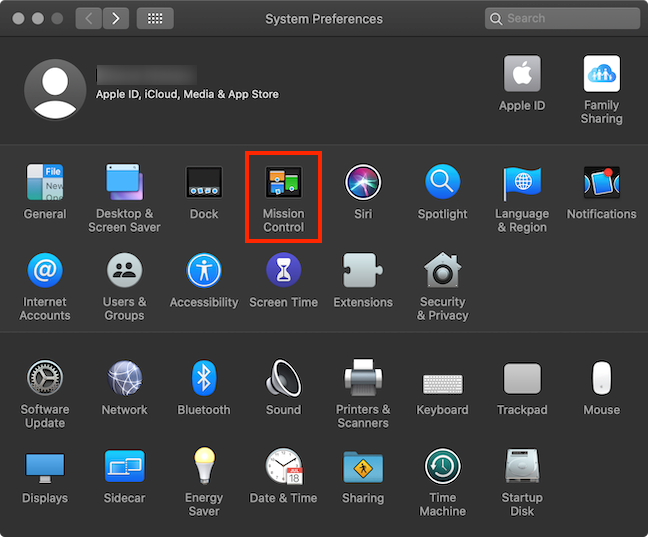
In the System Preferences app, the easiest way to access Hot Corners is to click on Mission Control.
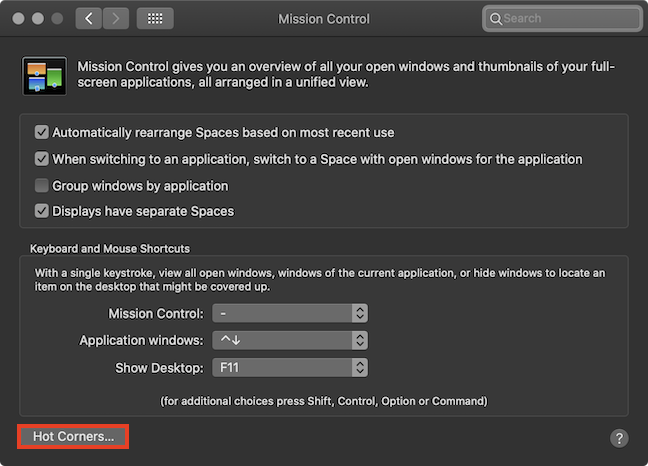
Click on the Hot Corners button at the bottom of the Mission Control pane.
You can also click on "Desktop & Screen Saver" from System Preferences.
On the "Desktop & Screen Saver" pane, access the Screen Saver tab. The Hot Corners button is at the bottom of the screen, so you can click on it to open the settings for this feature.
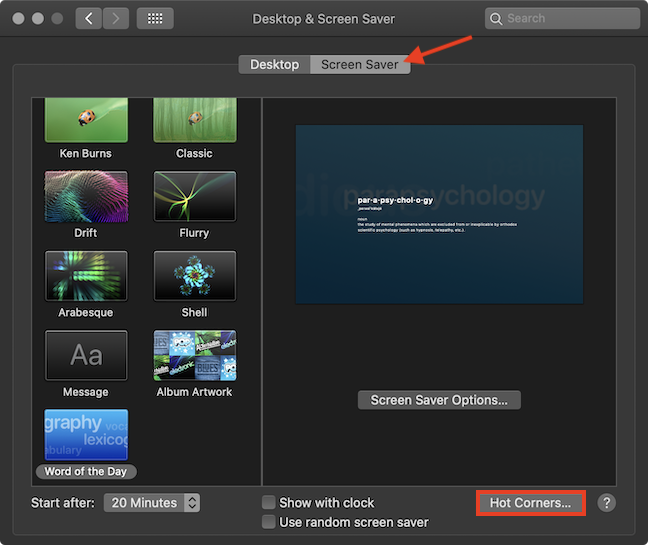
When you press the Hot Corners button, you get access to the Hot Corners settings. Keep reading to see how to configure them.
How to configure Hot Corners on a Mac
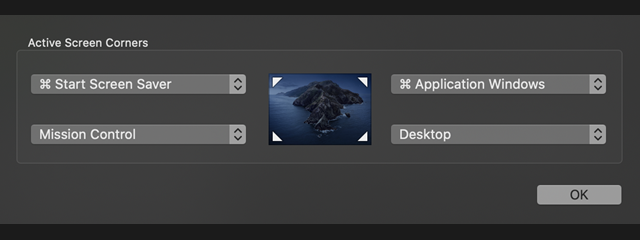
By default, the Mac Hot Corners are inactive. While this means they can easily be overlooked, the alternative of accidentally triggering them would confuse users. After pressing the Hot Corners button, as shown in the previous section, the Active Screen Corners panel pops up.
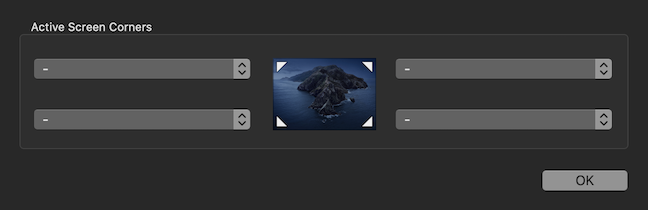
Each field corresponds to one of the four screen corners, as you can easily deduce from the panel. If the hyphen is shown next to a screen corner, it is not currently active. Click on the arrows button next to any screen corner to open a list of available actions.
The Hot Corners list of actions is the same for every screen corner. Let's see what each of them does:
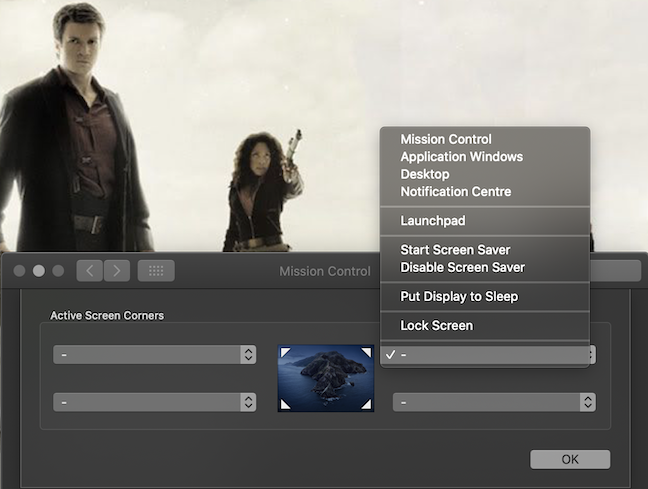
- Mission Control - instrumental if you use a lot of apps and windows, offers an overview of the items currently open on your Mac, letting you switch between them.
- Application Windows - offers an overview of all the open windows of the current app, and, for some apps, it also shows recently accessed files. You can also switch between open files and access new ones from this view.
- Desktop - moves all the open windows to the sides, showing your desktop. If you're using your desktop to store files and folders, it helps you access them and move them around faster.
- Notification Centre - the least useful of all these actions in our opinion, brings out the Notification Centre, which already has its dedicated button in the top-right corner.
- Launchpad - opens the Launchpad, where you can find, access, and organize the apps on your Mac.
- Start Screen Saver - immediately starts the Screen Saver, hiding your screen's content, until you move the mouse away from the corner.
- Disable Screen Saver - disables the Screen Saver while the mouse is in the Hot corner.
- Put Display to Sleep - turns the display off immediately, consuming less power.
- Lock Screen - immediately locks your screen, hiding its contents. While this comes in handy when working with sensitive information, it can become annoying to insert your password every time it happens.
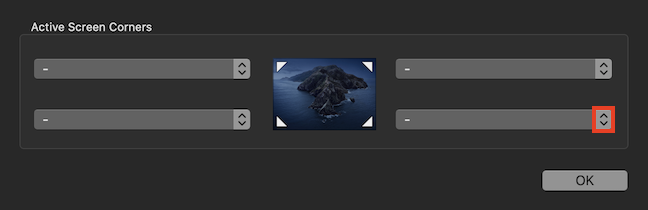
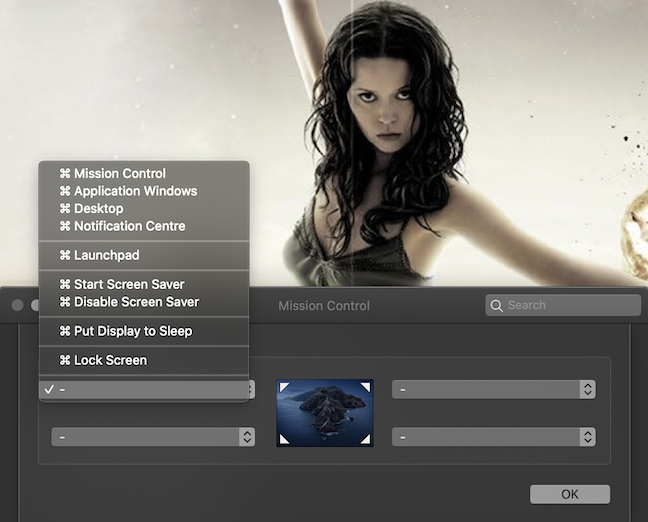
To assign one of the actions to a screen corner, open the dropdown menu for that corner and click on the action. Selecting the hyphen option deactivates the Hot Corners.
Because the Mac Hot Corners can be triggered accidentally, macOS also lets you use a key in combination with a screen corner to perform a specific action. The modifier keys you can use for this are Shift, Control, Option, and Command. Click on the arrows to open the list of actions for a screen corner, hold down on the modifier key on your keyboard, and then click to select the action. The symbol for the chosen key is displayed next to the available actions.
TIP: You can assign the same action to multiple corners. You can also use combinations of modifier keys together with a screen corner, if it's comfortable.
How to use Hot Corners on a Mac
After you configure them, the Mac Hot Corners are easy to use. Just move your mouse cursor to the screen corner, or press the modifier key(s) while moving your mouse cursor to the corner, and macOS performs the assigned action. This is how our Hot Corners are configured:
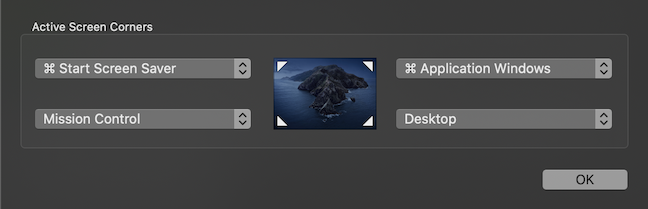
We used modifier keys for the upper screen corners because these are the ones easily triggered by accident. The Desktop and the Mission Control actions can be accessed without modifier keys in our setup, because we use them frequently and need to reach them with ease.
How did you configure your Hot Corners?
We actually came across the macOS settings for Hot Corners by accident and decided to investigate what turned out to be a very useful feature. What about you? How did you hear about the Mac Hot Corners? Did you set yours up? What actions did you choose? Use the comments below to let us know.