Subnet masks are used to split IP addresses into two different parts: one of them tells you the computer or device’s address, while the other tells you the network to which it belongs. In other words, subnet masks are used to divide networks into subnetworks, so that any data transmitted over a network can reach its destination correctly. Are you wondering how to change the subnet mask on your Windows 10 or Windows 11 PC? Do you want to learn how to change the subnet mask for all the computers and devices in your local home network? Read on and find out:
Read this first, before changing the Subnet Mask in Windows 10 or Windows 11
Before changing the subnet mask on a Windows 10 or Windows 11 computer, you should be familiar with what IP addresses and subnet masks are. You should also know how to find your Windows computer’s IP address.
Furthermore, on a Windows computer or device, you can change the subnet mask only if you’re using a static IP address. If that’s the case for you, or if you want to change your IP address and set a static one, follow the instructions in any of the first four methods in this guide.
If you’re using a dynamic IP address automatically generated by the DHCP service on your router, you can change the subnet mask only from your router’s web interface. Read the last section of this guide for instructions on how to do that on a home router.
Note that you must log in using an administrator account to be able to change your subnet mask (and/or IP address) in Windows.
1. How to change the Subnet Mask in Windows 10 using Settings
One of the easiest ways to change the subnet mask in Windows 10 is offered by the Settings app. Start by launching the Settings app and going to the Network & Internet category.
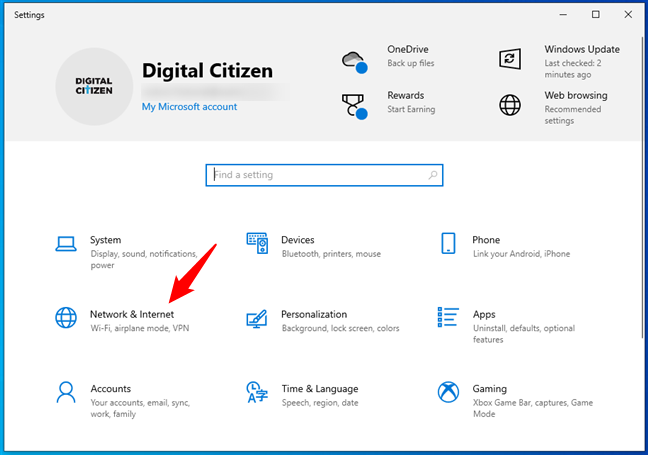
The Network & Internet settings in Windows 10
In Network & Internet, select Wi-Fi or Ethernet on the left sidebar, depending on the type of the network adapter for which you want to change the subnet mask. Then, on the right side of the window, click or tap on the corresponding network connection.
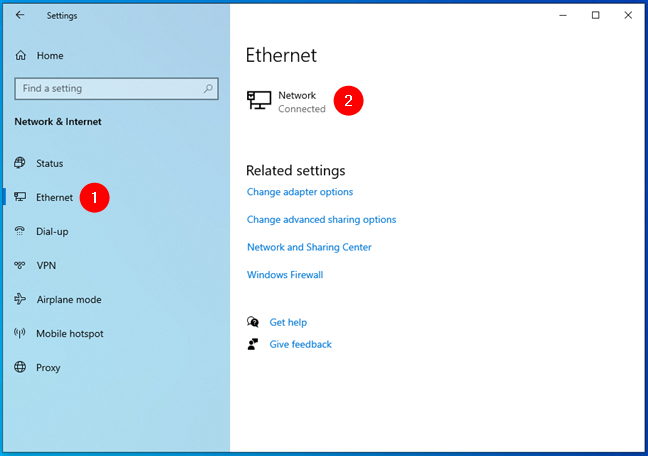
Opening the settings page of a network connection
On the network connection page, scroll down until you reach the IP settings section. Then, push the Edit button.
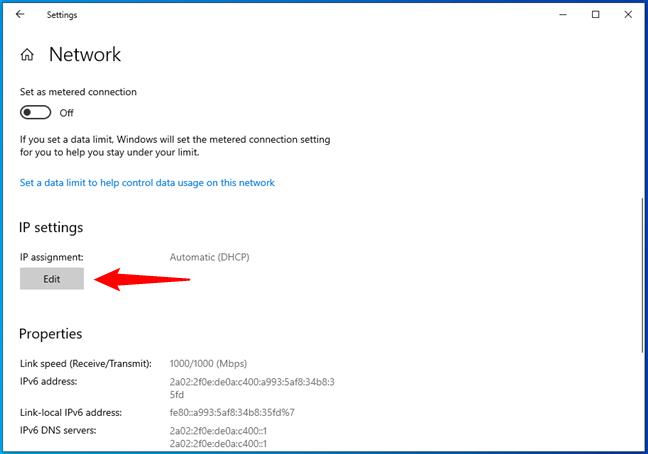
Editing the IP settings of a network connection
This opens a window called “Edit IP settings,” where you can change the IP address, subnet mask, gateway, and the DNS servers used by the selected network connection, both for the Internet Protocol Version 4 (TCP/IPv4) and the Internet Protocol Version 6 (TCP/IPv6). Scroll to the IPv4 or IPv6 section, depending on which of them you want to configure a new subnet mask.
The setting that determines the subnet mask is the Subnet prefix length. To change your subnet mask, change the value of the “Subnet prefix length” field to the one you want, and then press Save to apply it.
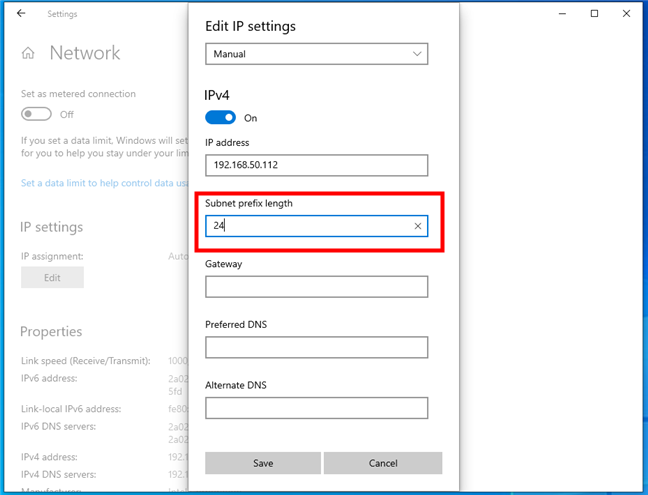
The Subnet prefix length setting of a network connection
What’s the subnet prefix length?
Showing you what to change in order to set a new subnet mask is one thing, explaining the subnet prefix length is another thing, so I believe a small dedicated sub-section is needed for this.
You see, in most Windows operating systems, the subnet mask is specified by the user, just like an IP address. This means that most users are accustomed to thinking about subnet masks as a series of four groups of numbers. Like, for example, 255.255.255.0, which is the most commonly used subnet mask on Windows home computers.
However, someone at Microsoft decided that Windows 10 should use a different kind of notation for the subnet mask. This different type of notation is called CIDR or Classless Inter-Domain Routing notation, and instead of four groups of numbers, it requires Windows 10 users to enter the so-called Subnet prefix length.
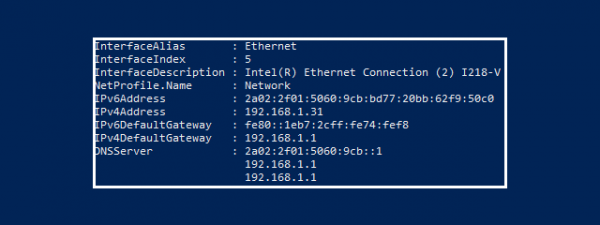
The Subnet prefix length controls the size of the subnet, and it tells Windows 10 how many bits of 1 are found in the netmask. For example, in the screenshot below, you can see that, for my network connection IPv4 protocol, I'm using a “Subnet prefix length” of 24, which means that the subnet mask is 255.255.255.0.
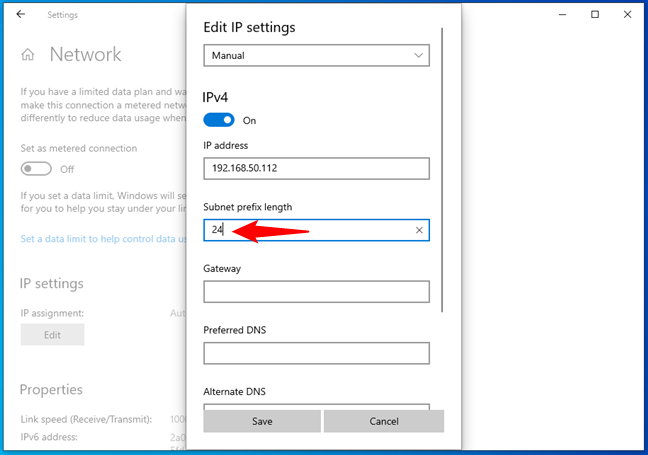
A Subnet prefix length of 24 means a subnet mask of 255.255.255.0
Let’s take another example and imagine that you want to use a subnet mask with a value of 255.255.0.0. In this case, the subnet prefix length would be 16. Or, if you want a subnet mask of 255.0.0.0, the subnet prefix length is 8. Do you see the pattern? Each “255” group of numbers from the subnet mask translates into a subnet prefix length of 8:
- When the first group is 255 and the others are 0 (255.0.0.0), the subnet prefix length is 8;
- When the first two groups are 255 and the others are 0 (255.255.0.0), the subnet prefix length is 16;
- When the first three groups are 255, and the others are 0 (255.255.255.0), the subnet prefix length is 24.
These are the most common types of subnet masks. However, you can use others as well, so if you need help calculating the prefix length for a certain subnet mask, check this online IP Subnet Calculator.
TIP: Always make sure you set the right subnet mask for your network. If you enter a wrong subnet prefix length and thus a wrong subnet mask is used, and the other computers and devices in your network are still configured with the default subnet mask, they won’t be able to communicate. For instance, you can lose access to your Wi-Fi printer or your local NAS (Network Attached Storage).
2. How to change the Subnet Mask in Windows 11 using Settings
If you’re using Windows 11, open the Settings app and select Network & internet on its left sidebar.
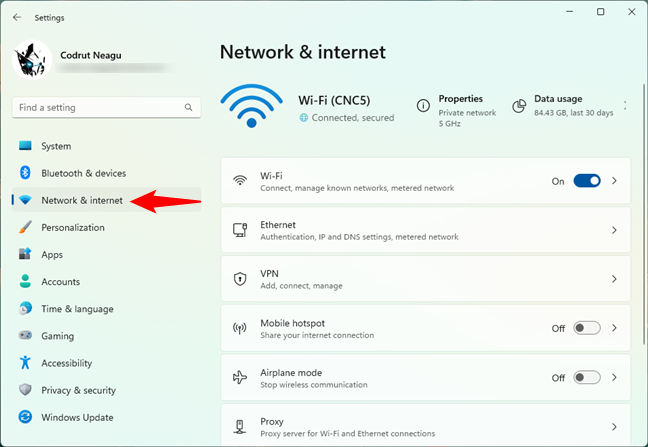
Go to Network & internet in Windows 11's Settings
In the Network & internet section, click or tap Wi-Fi or Ethernet on the right side of the window. Choosing which to click depends on the type of the network adapter for which you want to change the subnet mask.
Then, click or tap on the network connection’s Properties entry.
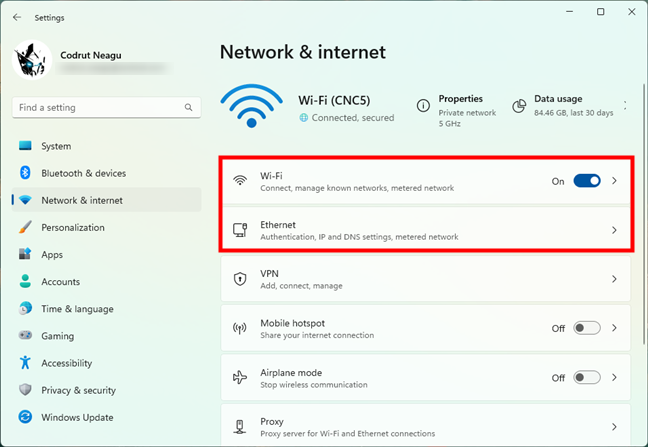
Select the type of network connection
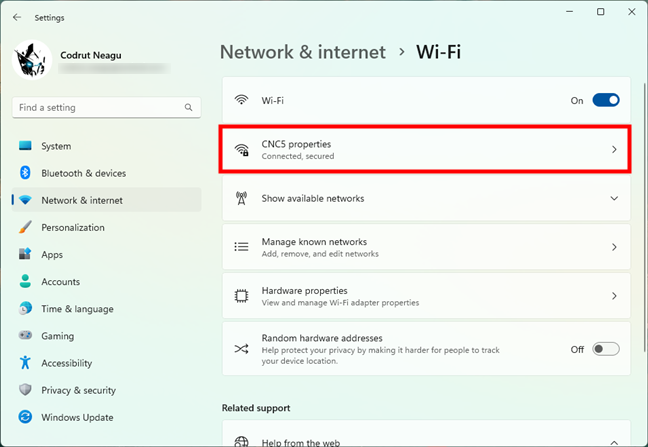
Click or tap on the network's name
This opens the details page of that network connection. On it, press the Edit button next to IP assignment.
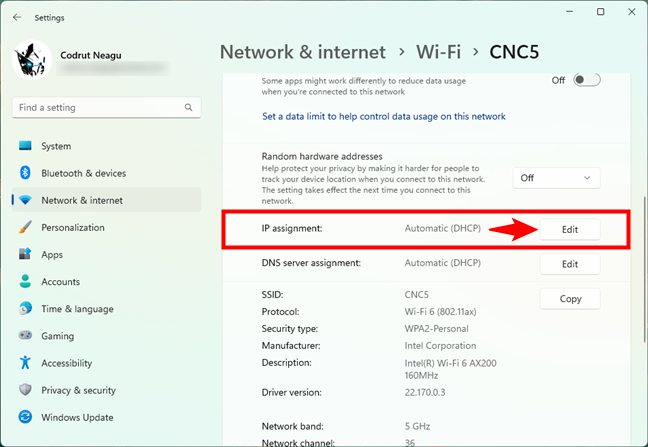
Choose to Edit the IP assignment settings
Then, Windows 11 will open a window called “Edit network IP settings.” In it, you can set the IP address, Subnet mask, Gateway, and the (Preferred) DNS servers used by the network connection. These settings can be changed for both Internet Protocol Version 4 (TCP/IPv4) and Internet Protocol Version 6 (TCP/IPv6).
Choose Manual in the “Edit network IP settings” box, and turn on the switch for IPv4 or IPv6 (depending on which of them you want to configure a new subnet mask).
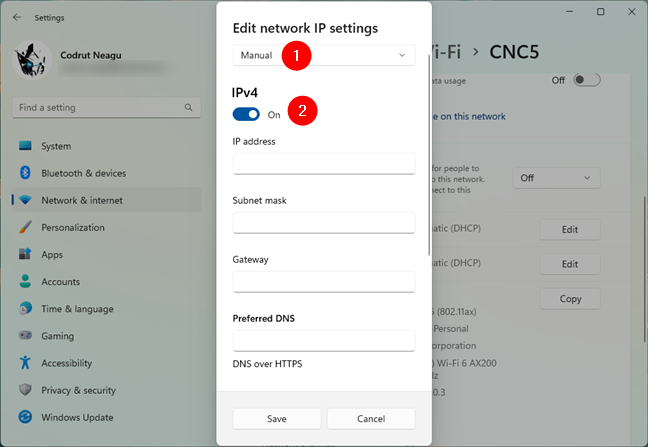
Edit network IP settings in Windows 11
The setting that determines the subnet mask is the one bearing the exact same name: Subnet mask. For example, in the screenshot below, you can see that, for my network connection IPv4 protocol, I'm using a 255.255.255.0 subnet mask.
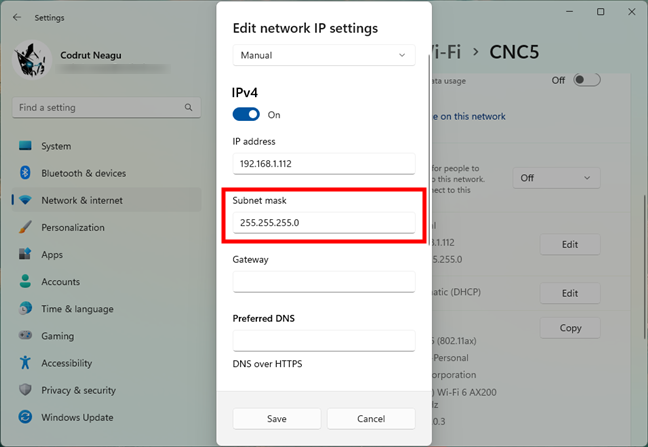
The subnet mask field
You can now set any subnet mask you want by entering its value in the Subnet mask field. For example, if you want your Windows 11 PC to use a subnet mask of 255.255.240.0, enter it just like that.
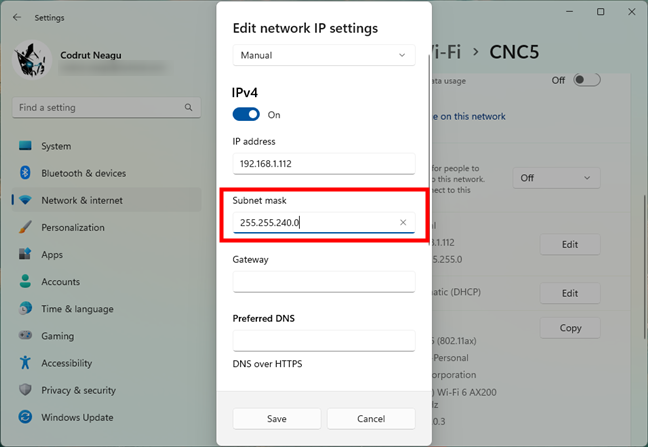
Change the subnet mask in Windows 11
Press Save at the bottom of the window, and the new subnet mask is immediately set.
3. How to change the Subnet Mask in Windows from the Control Panel
Windows 10 and Windows 11 still include the old Control Panel, which also lets you change your network adapter’s subnet mask. If you prefer using the Control Panel for this task, open it and click or tap on the “View network status and task” link from the Network and Internet section.
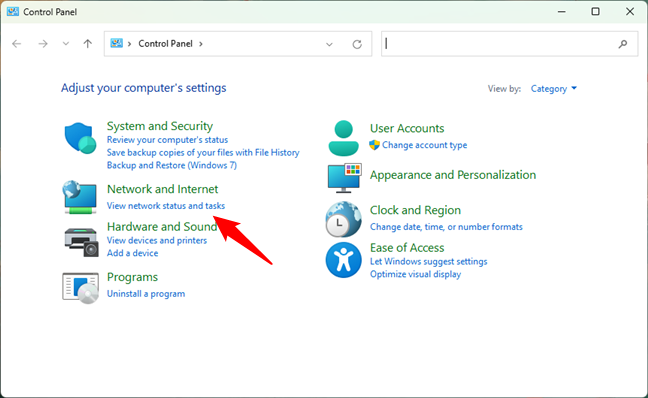
View network status and tasks in Control Panel
In the Network and Sharing Center, click or tap on the network connection for which you want to change the subnet mask.
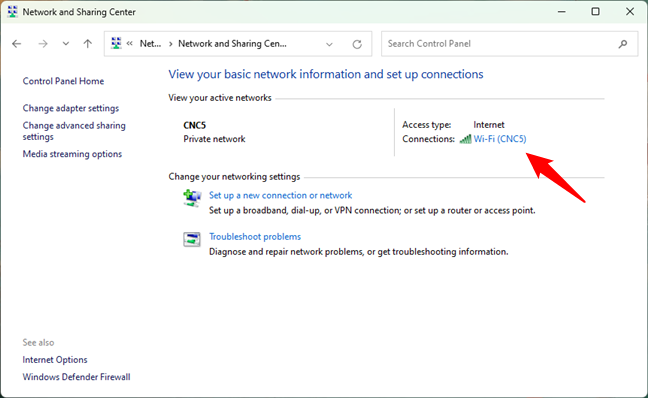
Opening the details of a network connection
The previous action opens the Status window of that network connection. In it, push the Properties button.
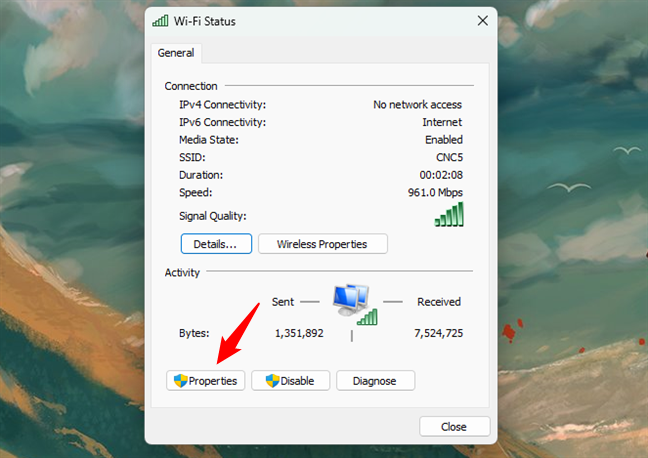
The Status window of a network connection
In the network connection’s Properties window, select Internet Protocol Version 4 (TCP/IPv4) or Internet Protocol Version 6 (TCP/IPv6), depending on the subnet mask you want to change. If you want to change both, repeat the next steps for each of them.
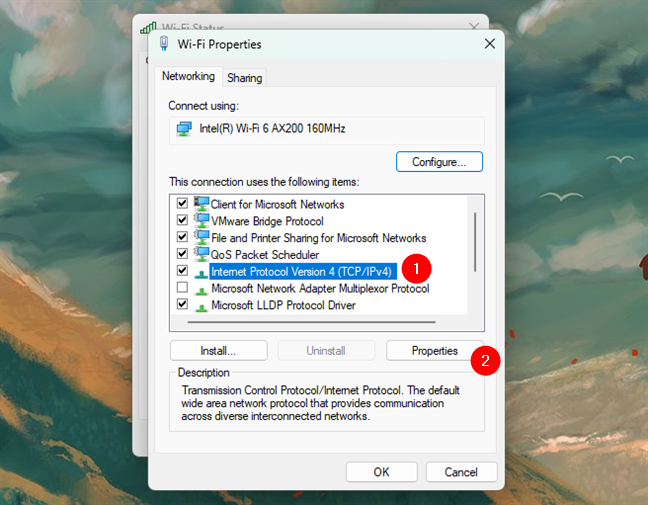
Opening the Properties window for IPv4
If you want to change the subnet mask used for the Internet Protocol Version 4 (TCP/IPv4), in its Properties window, enter the new subnet mask in the field bearing the same name. For example, I wanted to change my subnet mask to 255.255.240.0, as shown in the next screenshot.
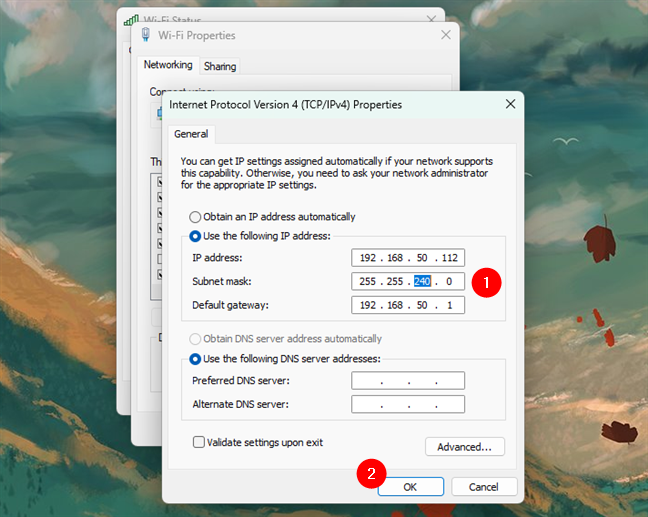
Changing the subnet mask of a network connection
Once you’re done making all the changes, click or tap on OK, and then close all the open windows. The new subnet mask that you’ve set is now up and running.
4. How to change the Subnet Mask in Windows using PowerShell
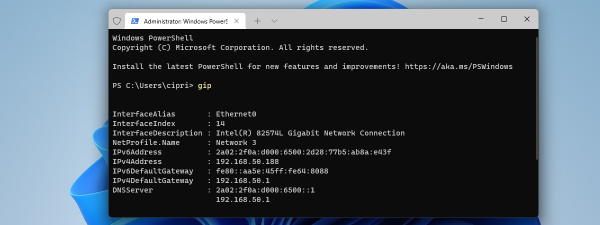
If you prefer a command-line environment, you can also change your subnet mask in Windows 10 or Windows 11 using PowerShell. Open PowerShell as an admin or open a PowerShell tab in Terminal and run the following command:
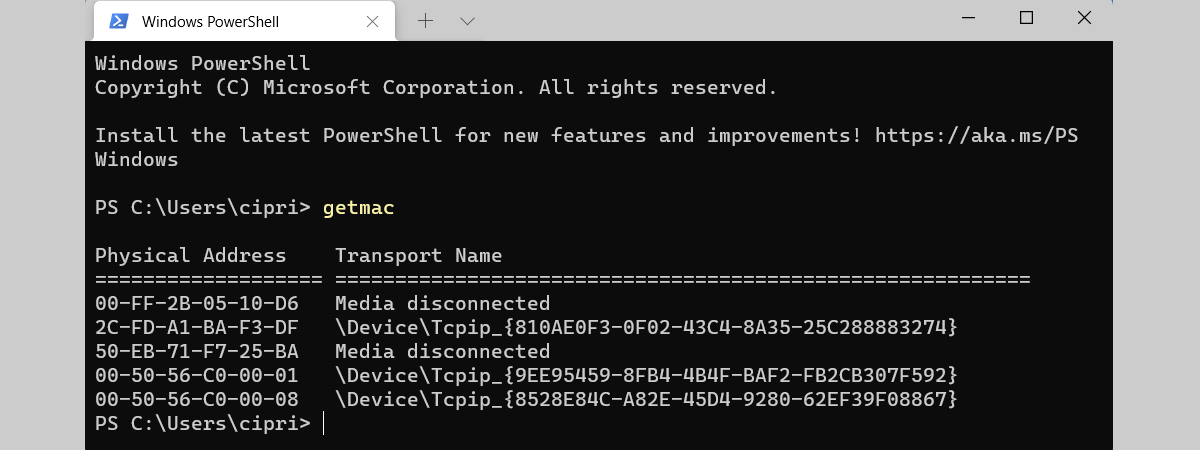
This command shows you all the network adapters installed on your Windows 10 or Windows 11 computer. Identify the one for which you want to change the subnet mask and note its ifIndex value. You can use the interface index number to select the network adapter in the next PowerShell command.
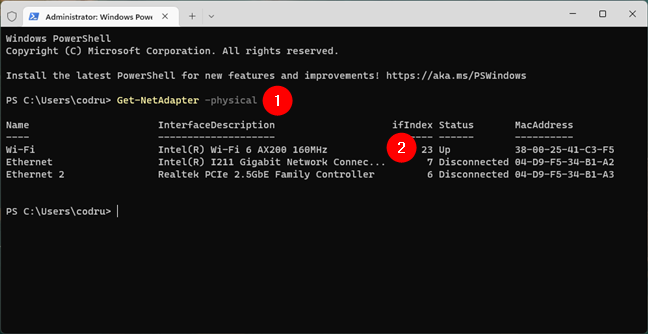
Find the interface number of the network adapter
To change the subnet mask, now run this command:
Replace [ifIndex value] with the interface index value that you’ve identified on the previous command, and replace [subnet prefix length] with the value of the new subnet prefix length that you want.
For example, I wanted to set a subnet mask of 255.255.255.0, so I ran this command:
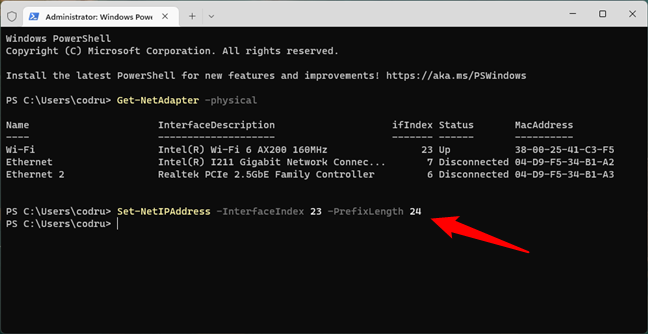
Set a subnet mask from PowerShell
The new subnet mask is instantly applied, so you can now close PowerShell.
5. How to change the Subnet Mask from the router’s interface, on a home network with DHCP
If you’re using DHCP to automatically assign IP addresses to the computers and devices in your home, you can change the subnet mask for all of them from your router’s administration interface. Use a web browser on your PC to access the router’s web interface. To do that, you must go to the router’s address and sign in with your user account and password. On most routers out there, the address is 192.168.0.1, 192.168.1.1, or 192.168.50.1, but it can differ. If you don’t know your router’s IP address, check this guide: How do I find my router's IP address? The complete guide.
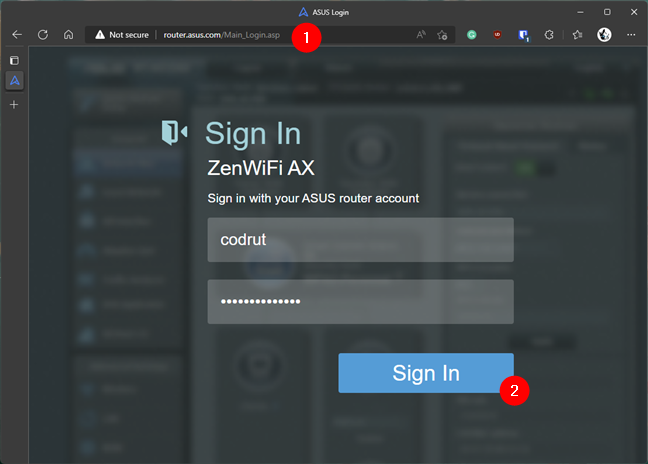
Opening the web interface of a router
On the router’s web admin interface, look for an advanced settings category called LAN. In it, go to the LAN IP settings section or tab, and change the value of the Subnet Mask with the one you want. Click or tap on Apply, Save, or OK. Once you do that, the new subnet mask is applied to all the computers and devices from your network that use automatic IP addresses. Note that your router might need to reboot to apply this change.
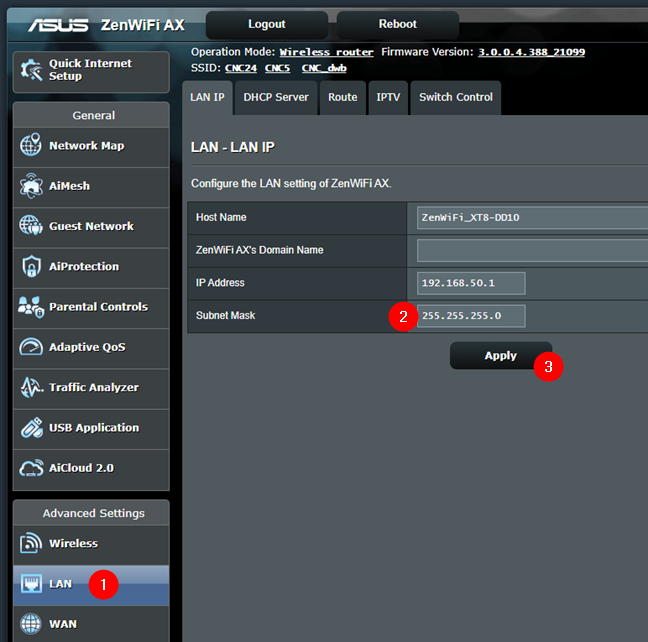
Changing the subnet mask on a router
That was it!
Why did you want to change the subnet mask on your Windows PC?
Now you know how to change the subnet mask on your Windows 10 or Windows 11 PC, or even on your entire home network. I'm curious: why did you need that information? Was it for work or your home? Also, if you have anything to add to this guide, don’t hesitate to comment in the dedicated section below.