Do you want to make your PC sleep or shut down at a particular time every day? Or maybe you want your PC to start playing a motivational video each time you start it or when it is 12 o'clock? If you wished for a way to program your PC to do certain things at certain times, you should read this article, as we are going to cover some of Task Scheduler's advanced features: creating advanced tasks, setting up their triggers, actions and security options. They are powerful when you want to be in control of your system and the tasks it is running. So be prepared for an extensive range of choices which allow you to set up every possible detail related to scheduled tasks. Let's get started:
NOTE: This guide applies to Windows 10, Windows 7 and Windows 8.1. To illustrate the things you can do with Task Scheduler, we are going to create an advanced task that shuts down the PC every day at 11:00 PM.
How to create an advanced task in Windows
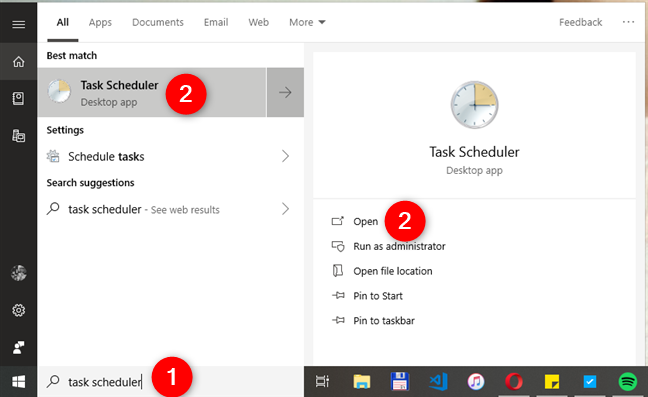
Start by opening the Task Scheduler. If you do not know how to do this, you should read this article: 9 ways to start the Task Scheduler in Windows (all versions). If you do not have time to read that guide too, know that a fast way to open the Task Scheduler, in any Windows version, is to use the search: search for "task scheduler" and click or tap the appropriate search result.
Also, if you have never worked with the Task Scheduler before, it might be a good idea to familiarize yourself a bit with it. For that, read this: How to create basic tasks with Task Scheduler, in 5 steps.
Now let's get to business: to create a new task, in the Task Scheduler window, go to the Actions panel and, on its right side, click or tap "Create Task."
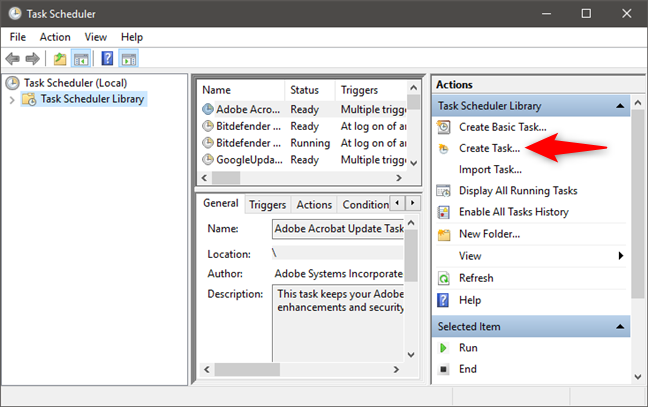
The wizard that starts lets you set up every detail about your new task, starting with its name and continuing with setting one or multiple triggers, actions, establishing conditions for running the task and so on.
Let's see how it works:
How to set the name, description & security options of a task
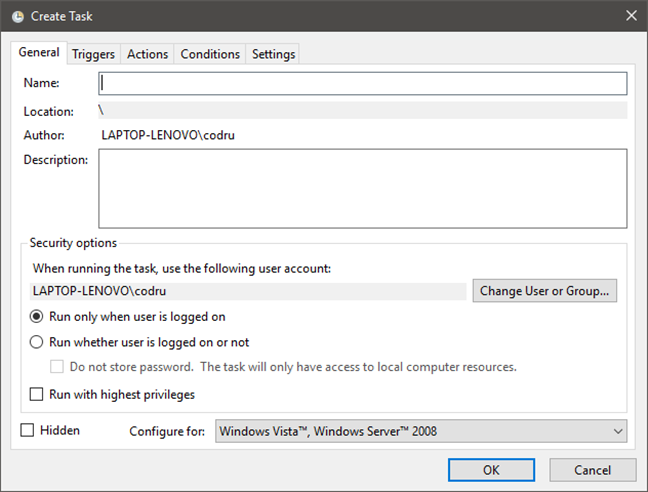
The first tab of the "Create Task" wizard is named General, and it is the place where you can set the name of the task and its description. Because we want to create a task that shuts down our PC every night, we are going to name it "Sleep at night."
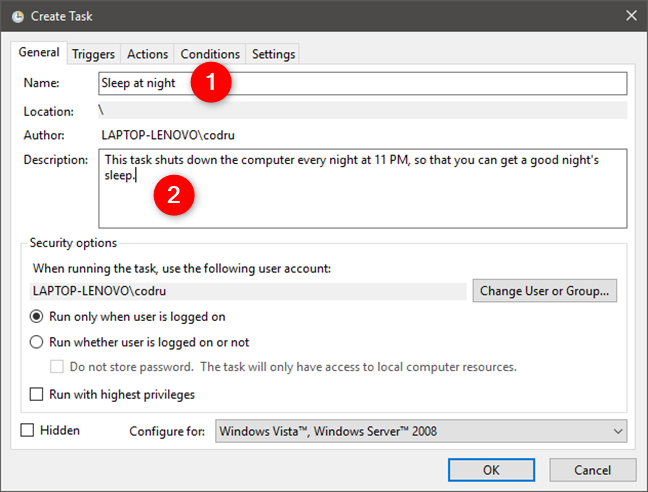
The General tab also lets you configure additional "Security options" related to the user account and privileges used to run the task that you are creating. By default, the user account that is used for running the task is the one you use for creating the task. If you want to make use of another user account when running the task, click or tap the "Change User or Group" button and select another.

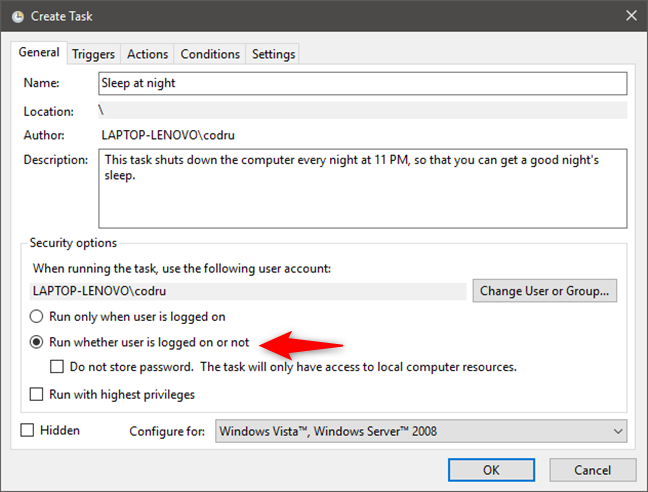
You can choose to run the task only when the user is logged on or run it even if he or she is not logged on. In our case, it does not matter if the user is logged on or not, as we want to create a task that shuts down the computer.
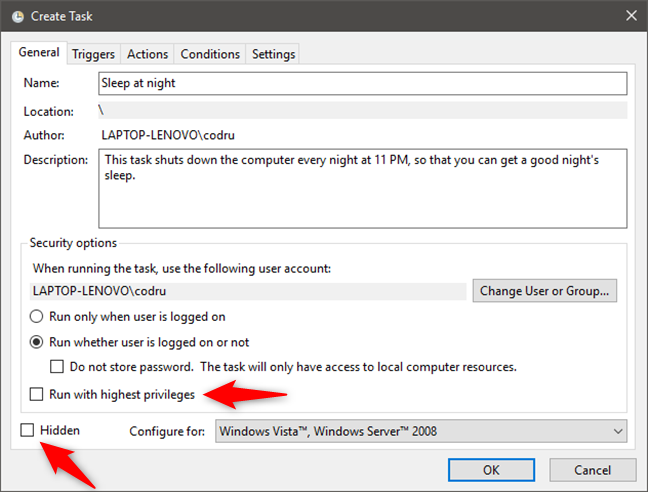
If your task needs administrator permissions, do not forget to check the "Run with highest privileges" checkbox. Then, check the Hidden option if you do not want the task to be visible. This means that the logged on user is not notified when the task is started or ended. We are not going to do that because we want the user to be able to stop the shutdown procedure if he or she wants to use the PC further in the night. 🙂
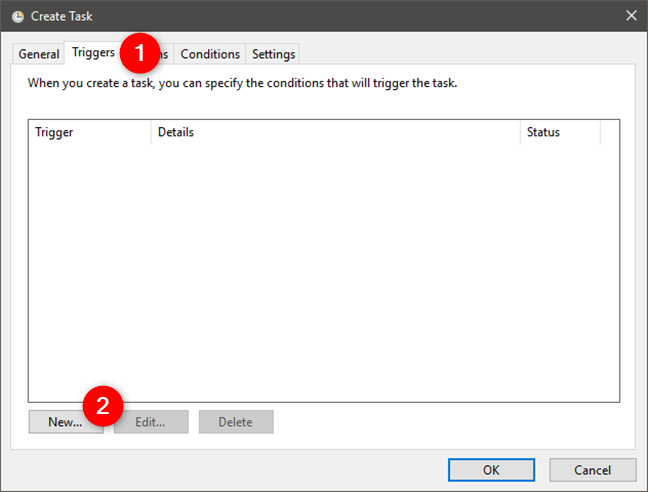
That is all there is regarding general settings. Let's go to the Triggers tab.
How to set the triggers of a task in Task Scheduler
The Triggers tab lets you set multiple triggers. To add a new trigger, click or tap the New button, from the bottom of the window.
The first trigger setting is to select when to begin the task. Click or tap the "Begin the task" drop-down box and choose one of the available options.
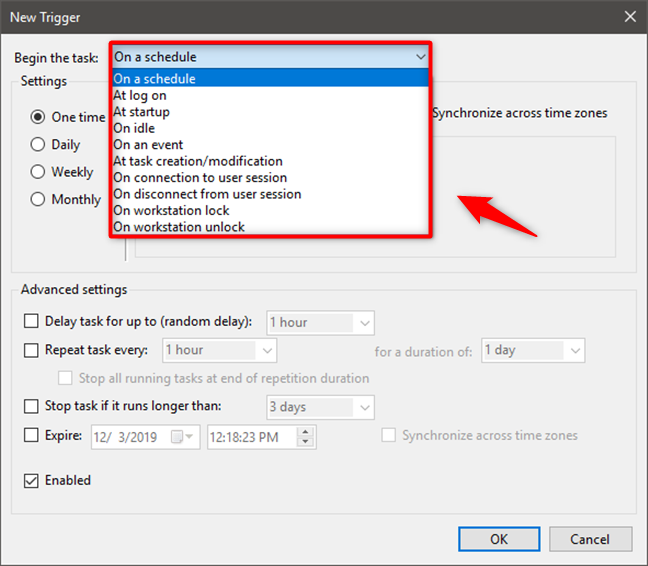
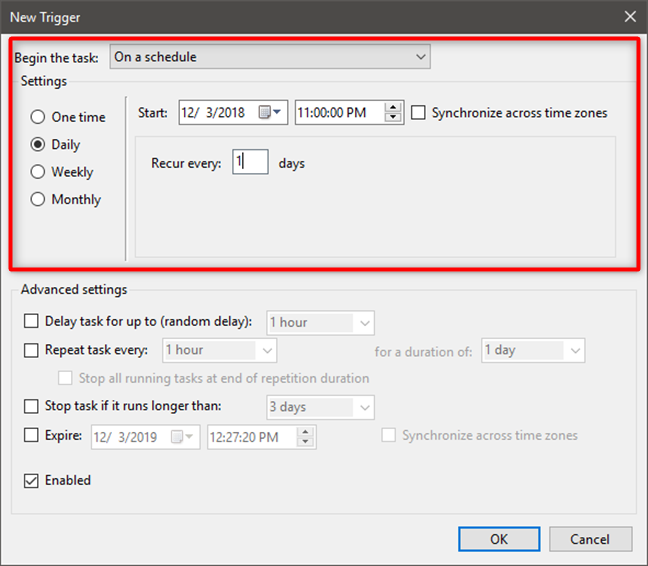
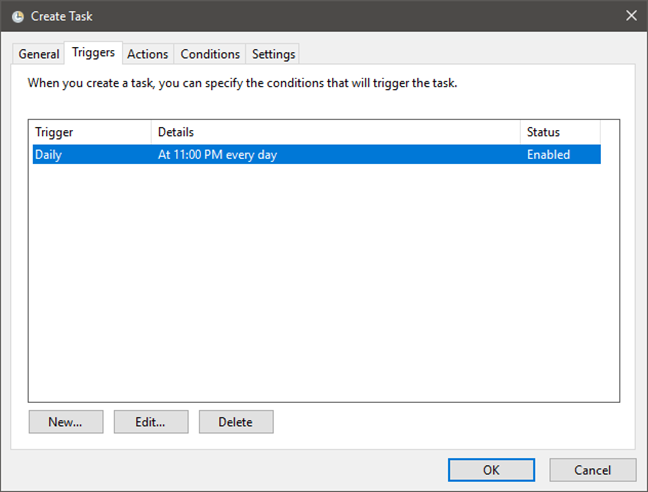
For our shutdown task, we must choose "On a schedule" and set the task to run Daily, at 11 PM.
We have already talked about some of the other triggers available, in this tutorial: How to create basic tasks with Task Scheduler, in 5 steps. However, there are a few additional triggers compared to the Create Basic Task wizard, such as: "At task creation/modification," "On connection to user session," "On disconnect from user session," "On workstation lock" and "On workstation unlock." Based on the option you chose, you are required to set different things in the Settings pane, but the Advanced settings that are available remain the same no matter what trigger you choose.
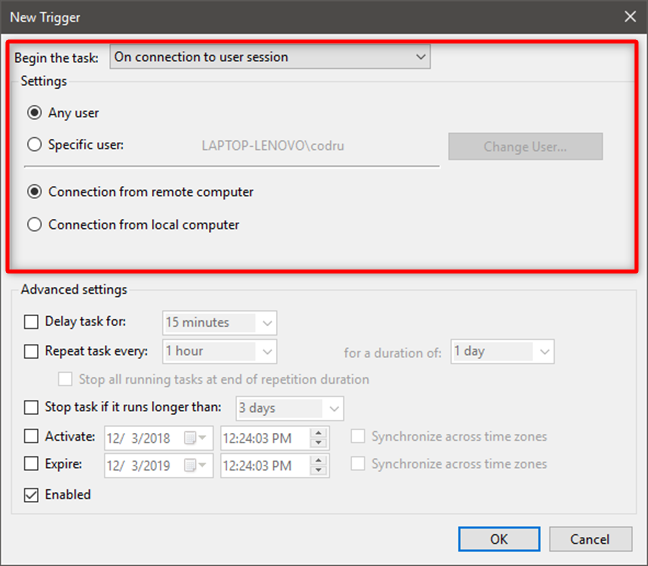
For the triggers named "On connection to user session" and "On disconnect from user session" you can make the following settings:
- Establish if "connection to user session" refers to any user or a specific user. For the latter, the default is the current user. However, you can click or tap Change User and choose another user.
- Establish if connection refers to a connection from a remote or a local computer.
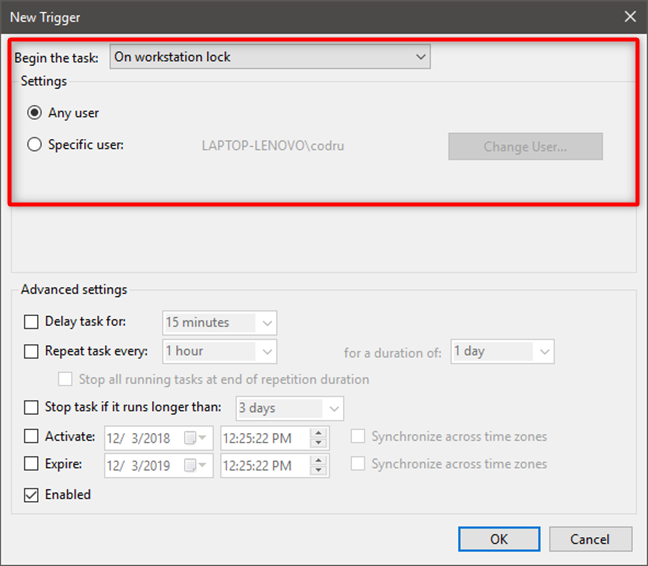
For the "On workstation lock" and "On workstation unlock" triggers you only have to set if this refers to any user or a specific user. By default, the specific user is the current one. You can click or tap "Change User" to select another user account.
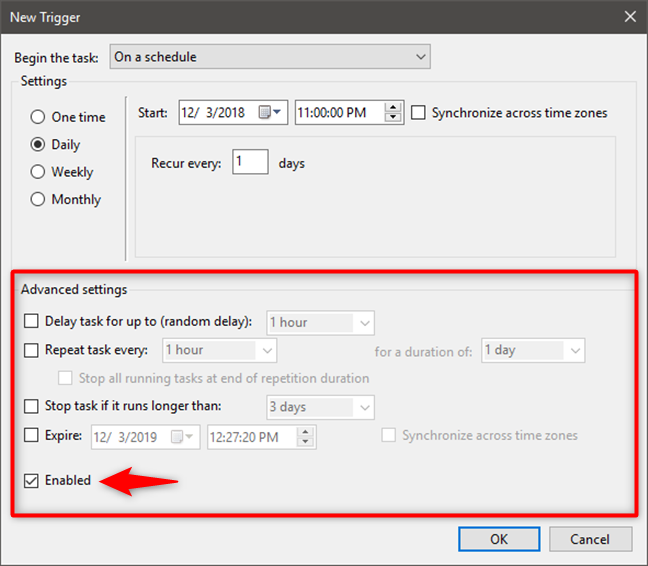
How to set the advanced settings for the triggers of a task
The available Advanced settings are the same for all triggers. For each available option, you must first check the corresponding box to see the list of similar choices. You can make the following settings:
- Delay a task for a certain time: 30 seconds, 1 minute, 15 minutes, 30 minutes, 1 hour, 8 hours or 1 day;
- Choose the time interval after which the task is repeated (5, 10, 15, 30 minutes or 1 hour) and the duration of the repeat (15 or 30 minutes, 1 or 12 hours, 1 day or indefinitely);
- If your task, for some reason, might run longer than the period you specify you can choose to have it stopped automatically;
- You can set an activation and expiration date and time. This means the dates between which your task is going to be run when the trigger that you specify is met;
- You can enable or disable the task.
For the daily PC shutdown task that we are creating, we do not need any of these advanced settings: all we have to do is making sure that the task is Enabled.
Click or tap OK when you have finished with the settings for this trigger. Your new trigger is displayed in the list of triggers. You can either create a new one or select an already created trigger to edit it or delete it.
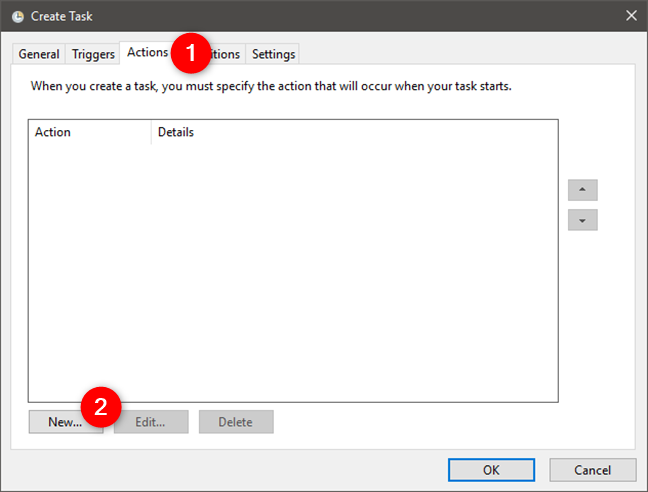
How to set the actions of a task, in Task Scheduler
You can assign multiple actions to a task. To do this, go to the Actions tab and click or tap the New button.
Choose one of the actions that the task must perform by clicking or tapping the Action drop-down box. You can select from: starting a program, sending an e-mail or displaying a message.
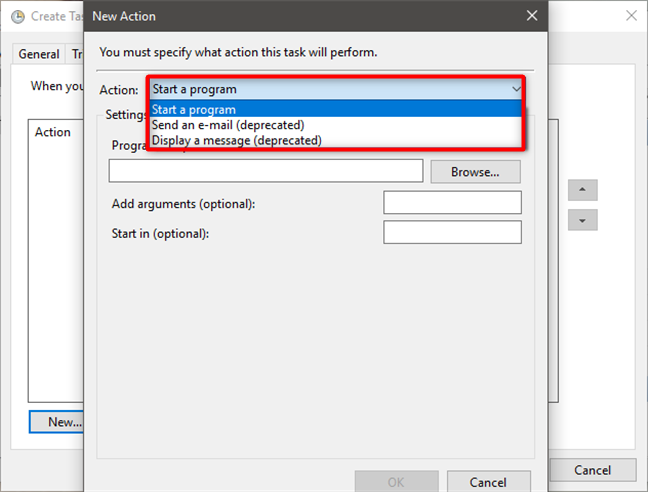
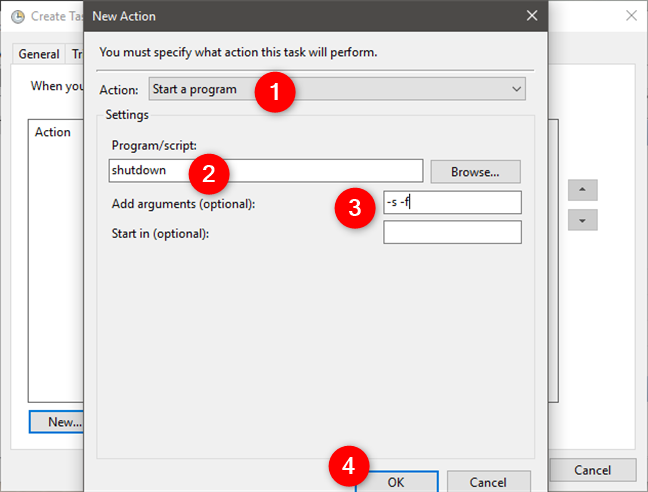
If you choose to start a program, click or tap the Browse button to choose the application to be started. Then, if needed, complete the optional fields called Arguments and Start in.
For our shutdown task, we must choose "Start a program." Then, we have to enter the shutdown command in the Program/script field. For this command to work, we also have to input the right arguments so, in the "Add arguments" field we are going to type -s and -f. The -s argument tells the computer that we want it to shut down, not reboot or sleep, and the -f argument tells it that we want to force apps to close at shutdown.
NOTE: If what you want is not to run a program but to send an email, you have to complete the fields From and To, set a subject, write the email text, add any attachments and specify the SMTP server (found in the properties of your email account). For displaying a message, you have to specify the title and the message. Remember that in Windows 10 and 8.1, the "Send an e-mail" and "Display a message" tasks are deprecated - meaning that these actions cannot be performed in these Windows versions.
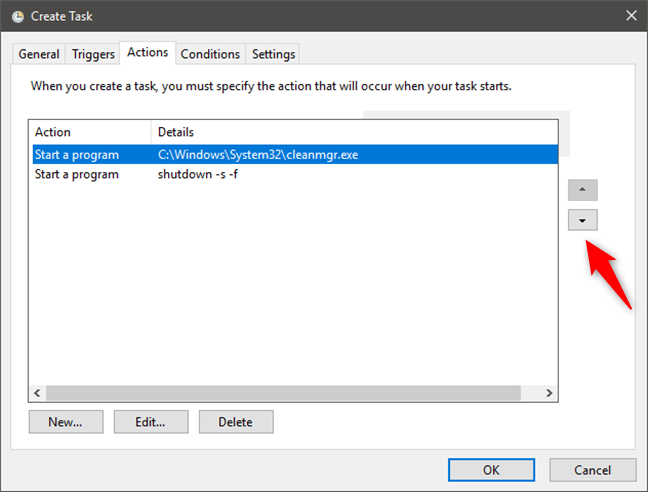
As we have mentioned previously, you can create multiple actions for a task. For example, you can create a task that runs Disk Cleanup and only then shuts down your computer. You can change the order of the actions by clicking or tapping the buttons found on the right-hand side of the actions list.
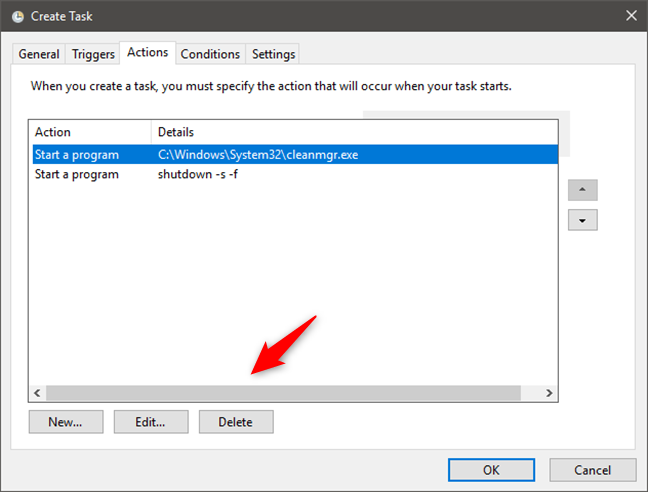
To modify an action, select it and click or tap Edit. To remove it, click or tap Delete.
How to set up the task conditions in Task Scheduler
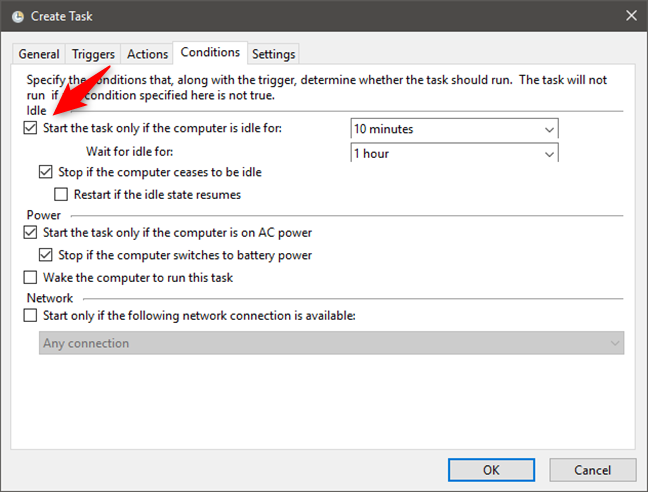
Apart from the trigger, you can specify several conditions for when the task is run based on the idle time that has passed, whether the computer is on AC power or a specific network is available. To set them, click or tap the Conditions tab. Note that if you want to create a shutdown task just like we did, you do not need to configure any of these conditions.
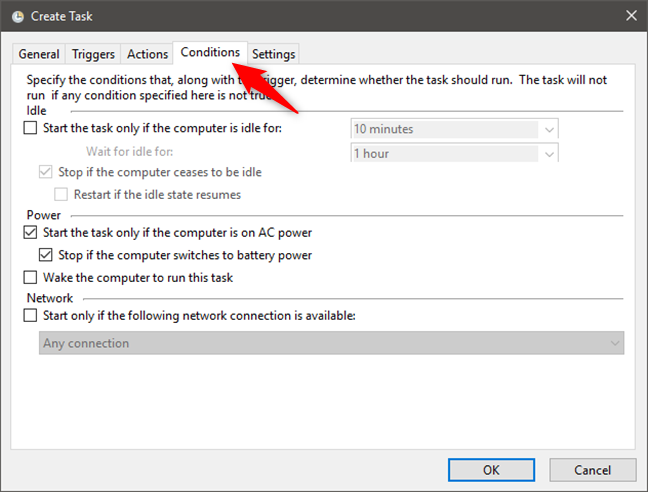
If you want the task not to interfere with your work, you can set it to run only when the computer is idle. Check the box that says "Start the task only if the computer is idle for" and choose one of the available periods. From the time you have set the task to start, you can choose to wait for the computer to switch into an idle state for a certain period or you can select "Don't wait for idle." When the computer is no longer in an idle state, you can decide to stop the task or restart it if the idle state resumes. As an example, these idle options are useful when you know that your task might require many system resources to run. Setting them to run when your PC or device is idle means that you are not going to be bothered by programs working slowly because of this task eating up most of your computer's resources.
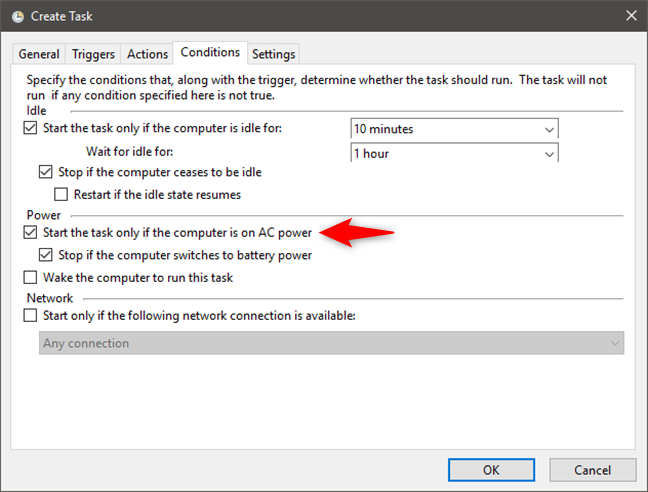
Since a task might run for a long time, the Task Scheduler allows you to set conditions for the task so that it starts only when the computer is on AC power, and to stop the task if you switch to battery power. If your computer is in sleep mode and it is the time to run the task, you can set the computer to wake up and run the task.
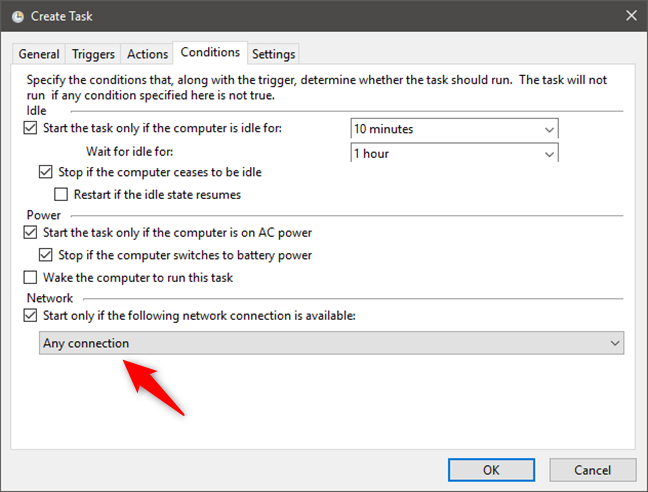
If you know that you need a specific network connection for running the task, check the box that says "Start only if the following network connection is available" and choose the connection that you are interested in.
How to set the failure behavior of a task
Task Scheduler allows you to make settings which come in handy in special situations such as the failure of the task or when the running task does not end when requested. Go to the Settings tab in the Create Task wizard.
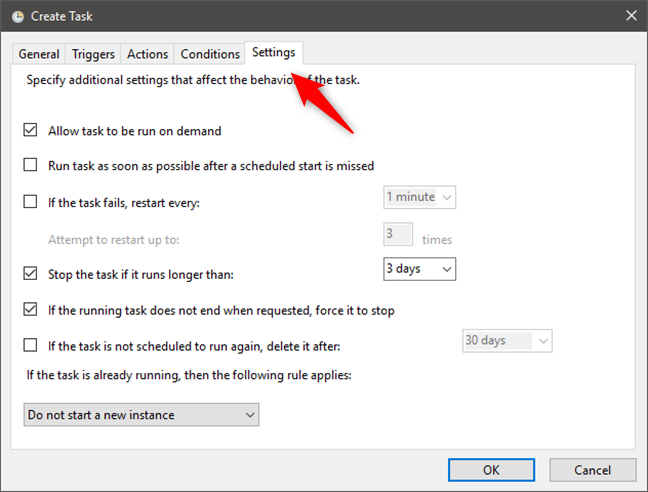
You can make the following settings:
- Allow the task to run on demand. Otherwise, it is only run when both the triggers and conditions are met.
- If the task is based on a schedule which is missed, you can set the task to be run as soon as possible.
- For the cases when the task fails, you can set it to be restarted every 1, 5, 10, 15, 30 minutes, or 1-2 hours. The restart can be attempted for the times that you set.
- If you think that something has gone wrong with your task, and it runs longer than 1, 2, 4, 8, 12 hours, or 1-2 days, you can set it to stop.
- If a task is not scheduled to run again, you can set your computer to automatically delete the task after 30, 90, 180, 365 days or immediately.
- If the task is already running and the time comes for it to run again, you can choose one of the following options: "Do not start a new instance" (the first instance of the task continues to run), "Run a new instance in parallel" (the first task instance continues to run, and the new task instance also starts), "Queue a new instance" (the new tasks instance runs after the first task instance finished), and "Stop the existing instance" (the first task instance is stopped, and the new task instance is started).
When you have set everything as you wanted, press the OK button and the task is instantly created, and you can find it anytime you want in the Task Scheduler Library.
Do you use Task Scheduler to create advanced tasks?
As you can see, the Task Scheduler offers a considerable number of settings which help you create lots of advanced tasks. While not all options seem easy to understand at first, by carefully reading this article and experimenting on your own, you should quickly get the hang of it and gain more control over your computer. If you have any questions about the Task Scheduler, do not hesitate to ask in the comments sectionbelow.